home

Ferret Nation Cages: Pros and Cons

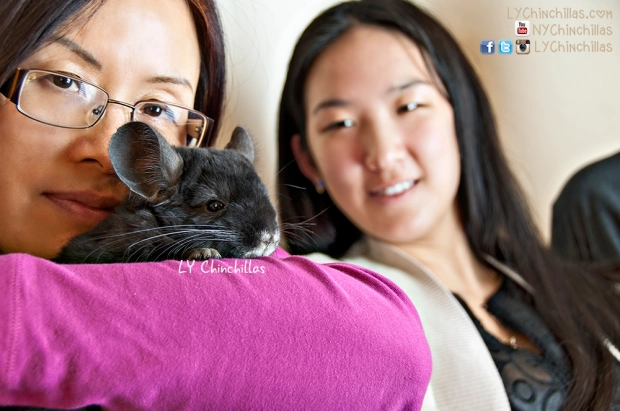
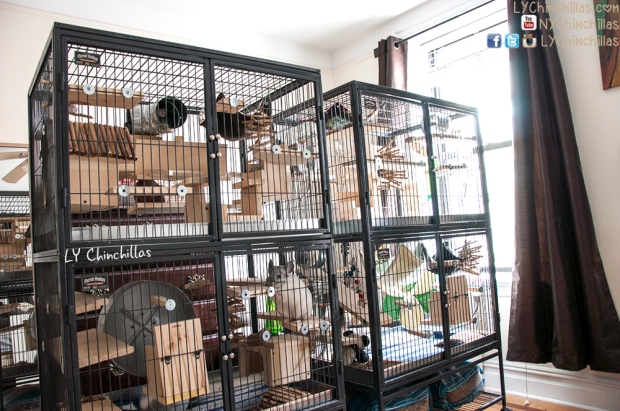
These past few weeks have been busy! As we slowly emerge from a long winter, a few major changes have come to LY Chinchillas too: we switched from our custom-built digs over to Ferret Nation 182 cages! Admittedly, I went a little crazy with the purchasing process because we ended up with 3 full double units, but after much deliberation on space and convenience, I’ve decided to keep the third double unit boxed up and in storage until more space allows for it in the future.

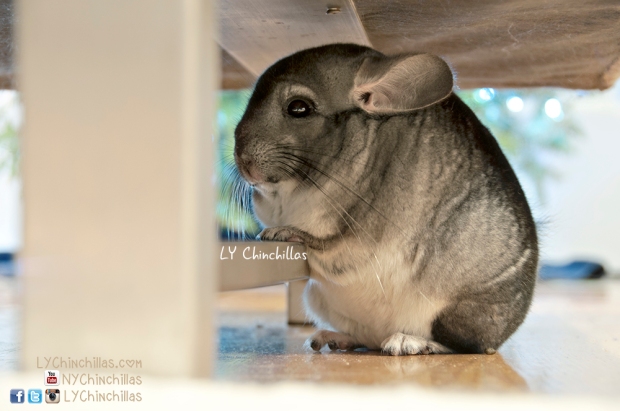
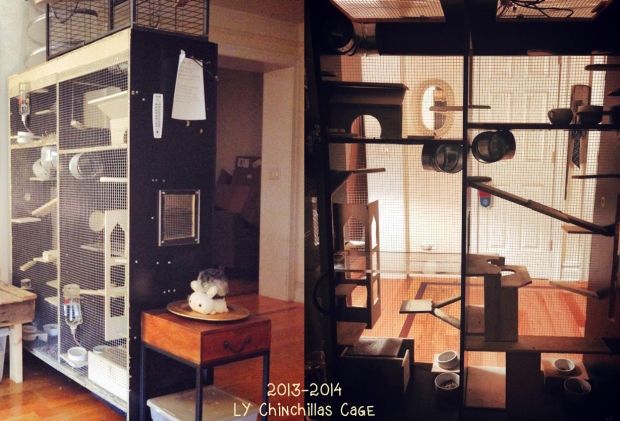
To start, I’ll speak a little about the emotional change that comes with a major cage change. We had built our custom cages with time, energy, and great care, and they turned out great. They were a little less spacious than I had hoped given the constraints of finding a convertible wardrobe unit, but the larger cages had a lot of vertical space for the two mosaic girls Lulu & Fifi, as well as my standard firstborn son Mittenmaus. Koko resided in the top cage partition, as she has never (to this day) displayed an iota of jumping capability. Separately, Muff had a custom cage built out of two smaller unit cages that he simply loved, including a climbing wall and lots of space for his jellybean self to roam and chirp. There were some downsides to the custom cages, but overall, they were built with great love and care with safety and personalities in mind.

Ferret Nation Cages

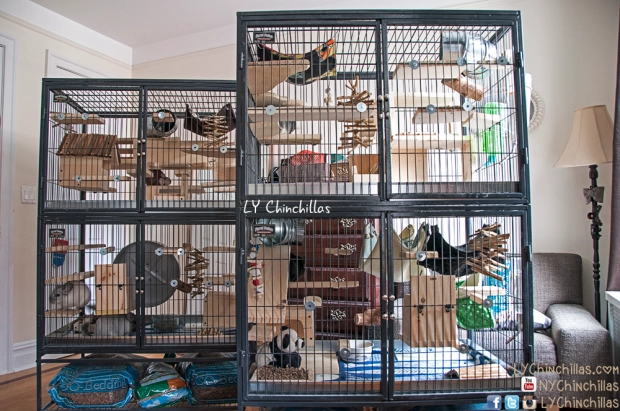
And then, before I knew it, the Ferret Nations were on their way. Honestly, it was a spur of the moment order. I had been thinking about new cages for a while, and after researching options on the market, opted for the 182 model. And then, before I knew it, the Ferret Nations had arrived. The cages have a ton of positive points, but the first few nights were actually filled with anxiety for both me and some of the chins.

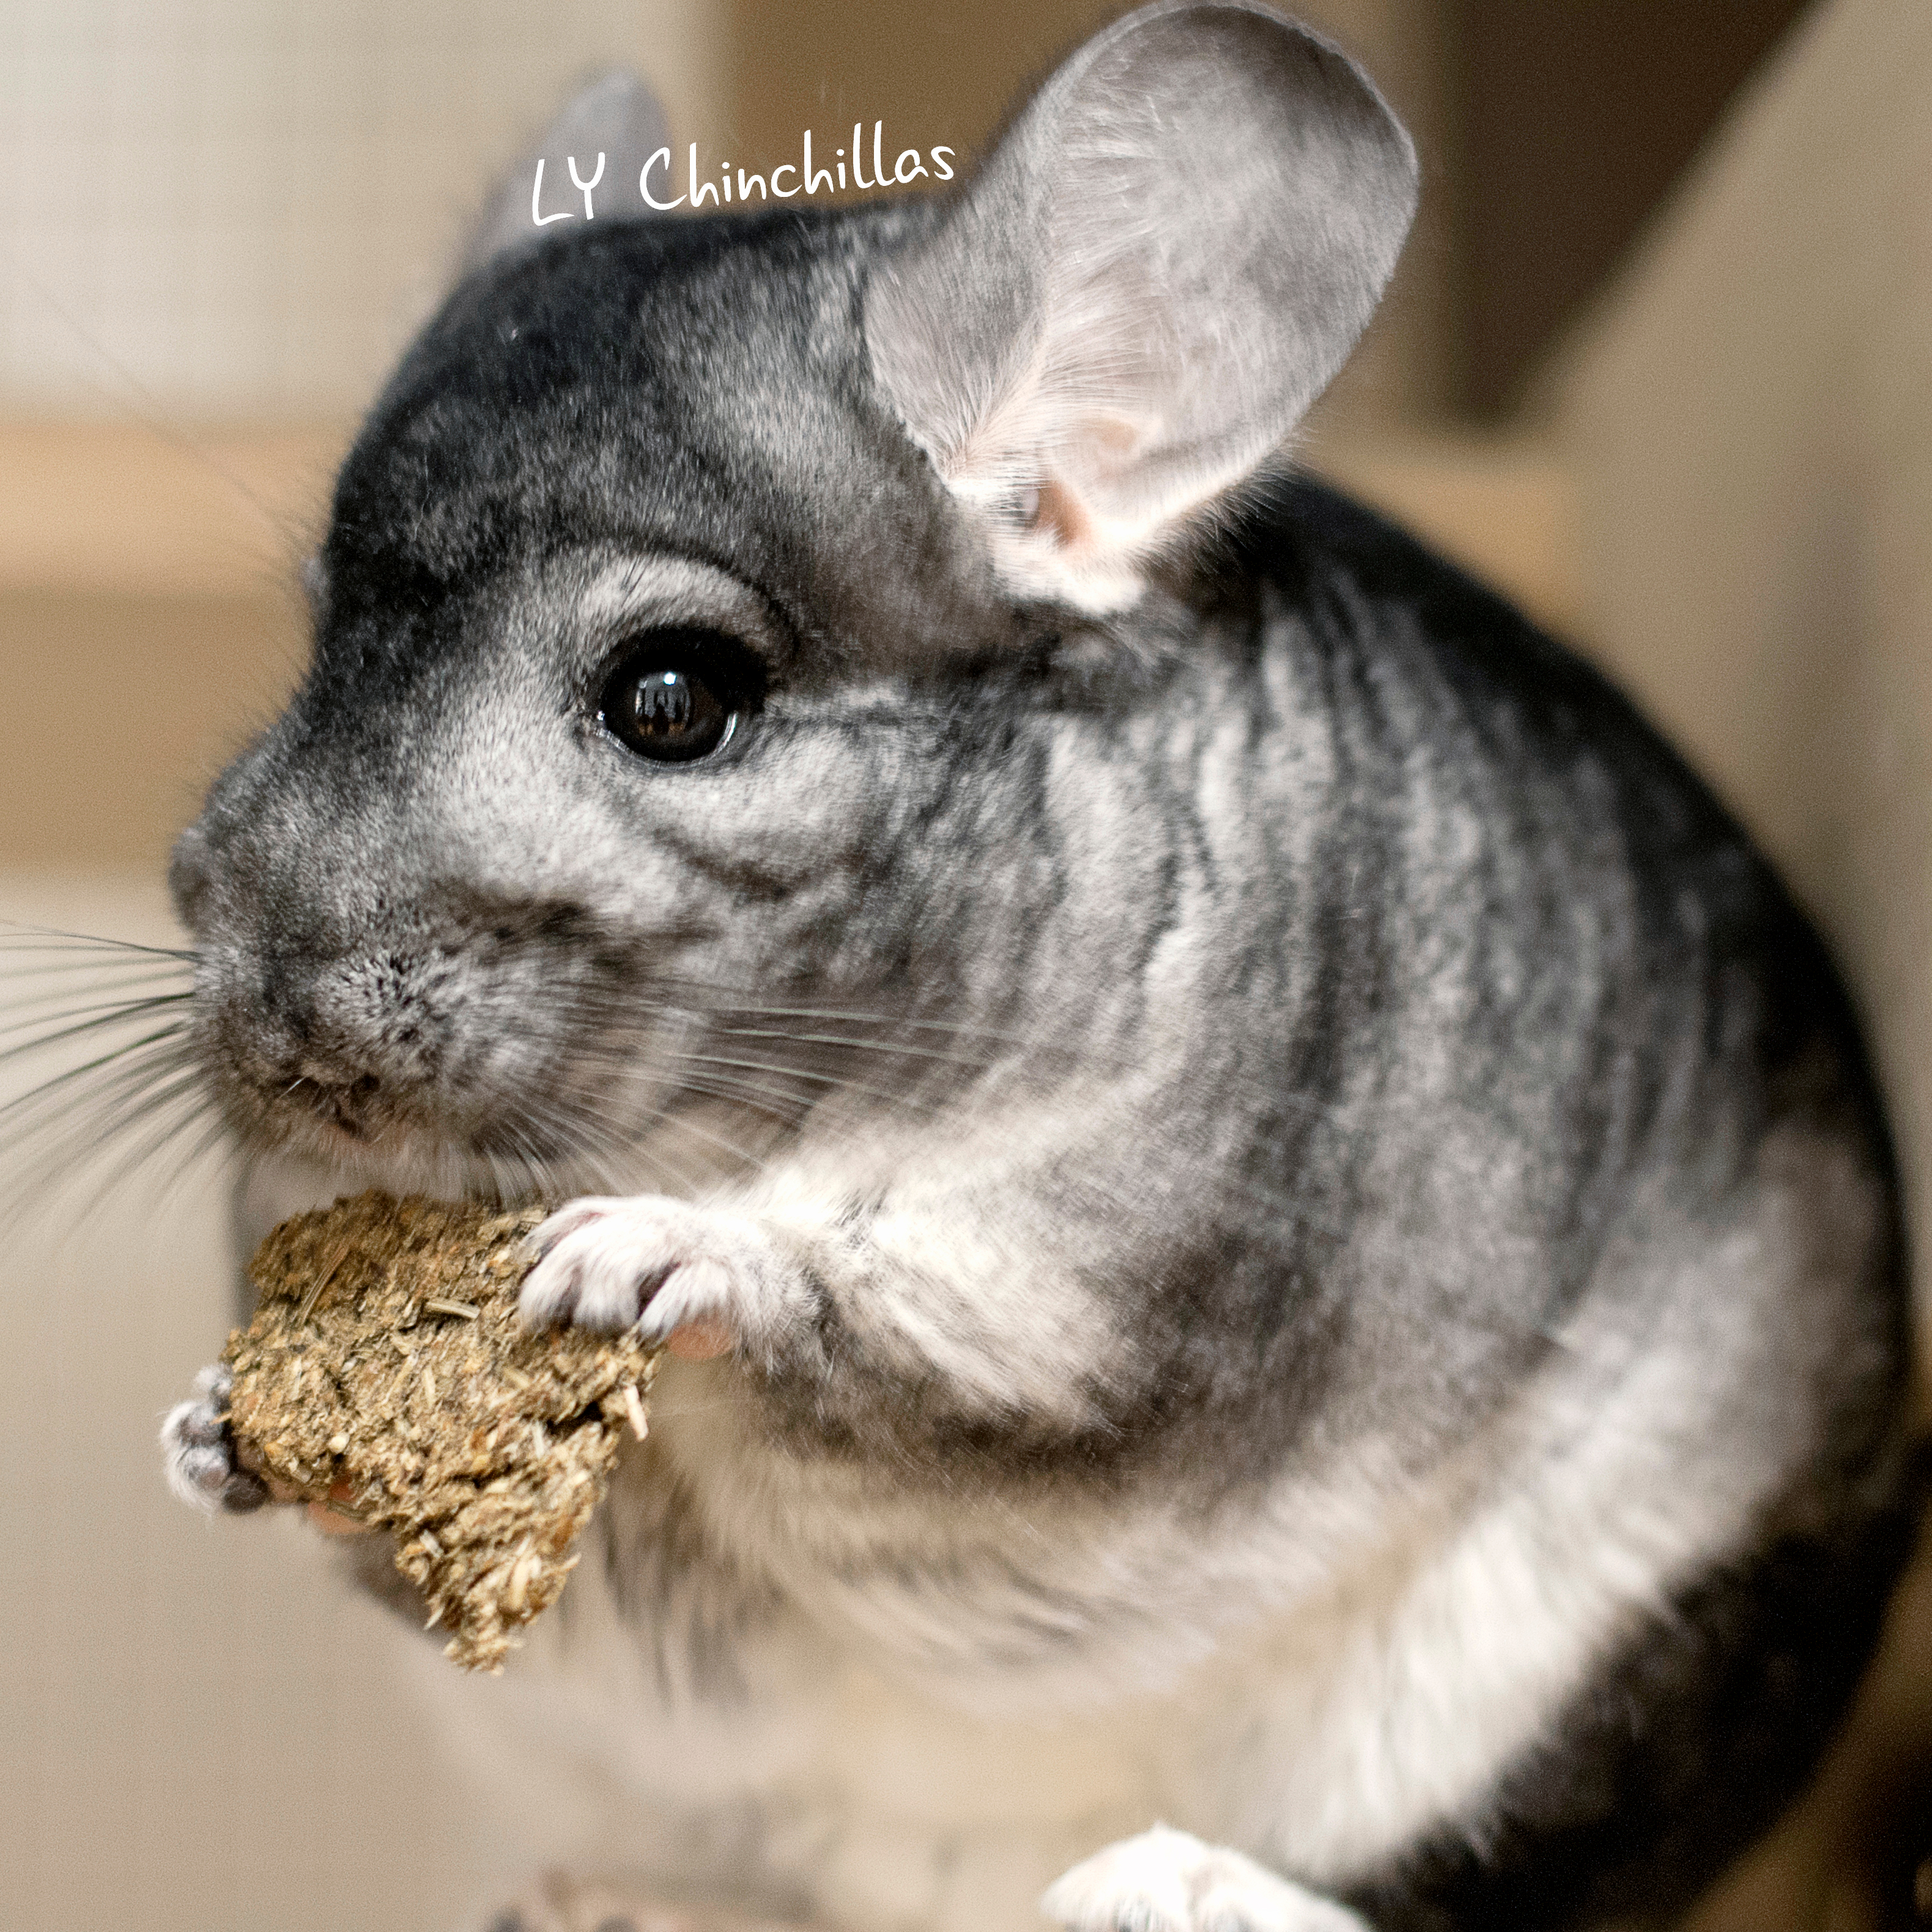
The girls didn’t mind at all. They are seemingly more independent and less attached to the comfort of any one place, as if peace of mind is something already engrained in their brains, bringing a sense of ease and calm to their transition. Mitty is an (unsuccessful) escape artist, that’s just how he rolls. He explored his cage to the fullest, memorized each jump and leap and corner, and settled in. Of course, he’s still going forward with his master plan of eventually escaping, and I do wish I could give him a full double unit to himself, but the space is adequate for him and I’m confident that he will adjust over time. Muff, on the other hand, was as nervous as I was. He missed his old cage! Truthfully, this space was a little bit of a downgrade for him, height-wise. The way Muff was acting, I was really starting to doubt my decision. There was a noticeable increase in stress: nervous squeaking, an unwillingness to talk to me or meet my hands, weight loss, and agitated jumping for several days. Part of me wanted to turn back and give him back his old everything, but I made the executive decision to wait and let the new cages settle in – for both me, and the chins.

Muff FN

Ladies FN

Mitty FN

Koko FN

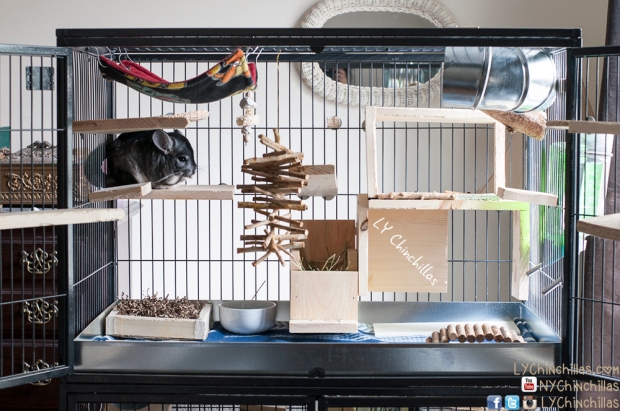
I knew that I purchased these cages for a particular reason: in the hopes that they are the very best, safest, and cleanest option for our living situation right now. Residing in a NYC apartment is not exactly spacious, and every square foot counts. The same day the cages were set up and before I had the chance to reconsider turning back, I had already dismantled the old cages and re-purposed any salvageable kiln-dried pine for ledges and platforms in the new cages. This made it tough, because the moment I started taking parts down, I knew that I wasn’t going to reconstruct the old cages. I had some restless sleep (yes, I’m seriously in tune with my kids) but I lived with it. It was time to move forward. In the following week, all of Muff’s weight loss had been regained, and attitudes from all parties were perking up.

So, that brings me to this very lengthy post – a post which, in many ways, is a formulation of my opinions that are still in infancy. I’ve had the new cages for under a month, and have had some time to modify their interiors to my liking. While I have yet to make any definitive emotional connection with Ferret Nation, I’ve also been forced to put my custom cages in my past. I figured that places me in a unique position to evenly critique the pros and cons of Ferret Nation.

Mitty FN2

PROS

  • User-Friendly, Lots of Control: This is a huge pro! These cages are truly designed for the pet owner, many thanks to Ferret Nation for that. All the points below will simply highlight and point back to this one major pro.
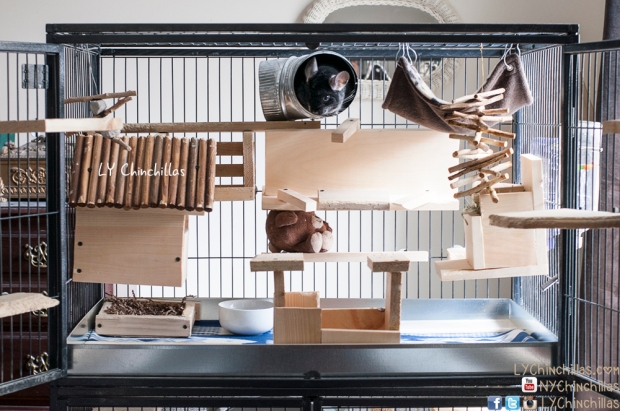
  • Reliable Doors: Two self-locking doors that swing open as far as possible? Yes, please! The doors swing open a lovely 225 degrees. This means you can deal with one chinchilla at a time with all the elbow space you need, without having to worry about another chin’s escape.
  • Mobility: Smooth wheels do the trick. Rolling the cages from room to room or rotating 360 degrees is totally manageable with one person. I should note that although the wheels have worked fabulously for these first few weeks, a double unit cage is pretty heavy and could cause some wear and tear on the wheel function over time. As mobile as these cages can be, they are more suitable for a stationary situation.
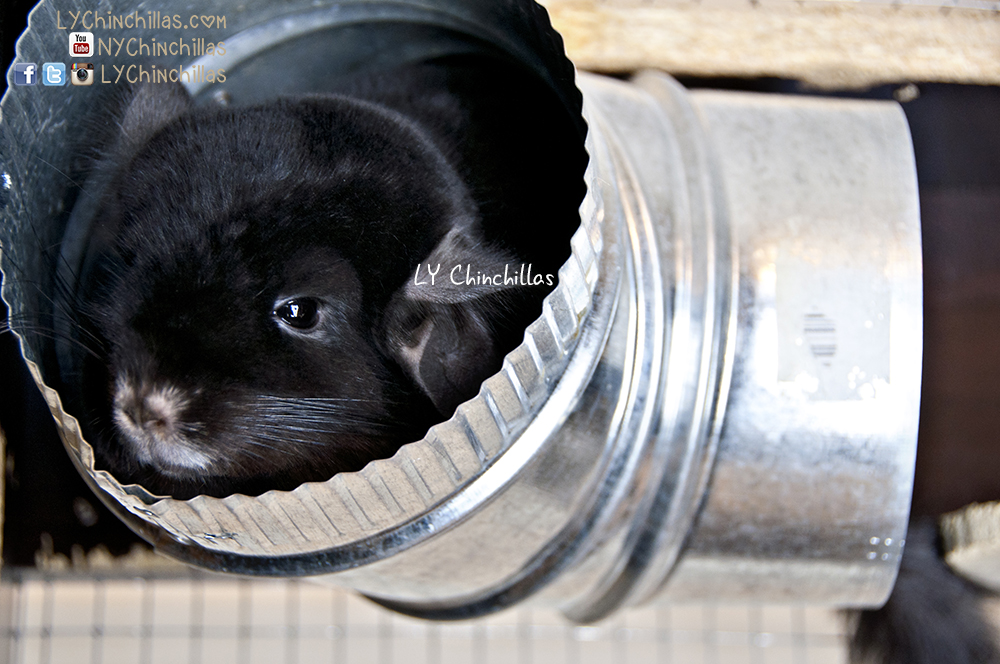
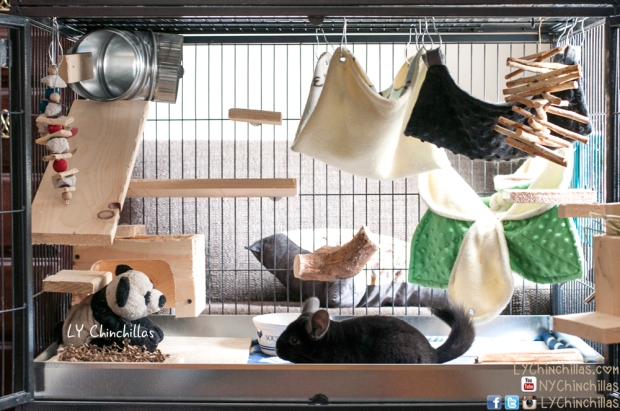
  • Light and Ventilation: Nothing sucks more than not being able to see your super cute chinchilla. These cages are awesome for that! Light passes through really easily, making it a little easier to catch the cuteness on camera (which, as chin owners know, is part of the struggle). Bottom levels have a little less light than desired, but such is the payoff for separated top and bottom units. An added bonus of light passage is also air passage, which helps ventilation and improves overall living conditions.
  • Universal Nature: So easy to use and self-explanatory, I would consider trusting a pet sitter to handle these cages – and for me, that says a lot.
  • Longevity: These cages will last for years. They may get scratched up, but these cages will stay relevant and get the job done.
  • Professional Look: The design is simple and sleek.
  • Safe and Sturdy: The bars and overall structure is pretty heavy duty, easing the weight of worry on neurotic owners.
  • Easy to Clean: A simple structural design makes cleaning as easy as could possibly be! Double unit cages have corners that are easy to reach with (almost) no hidden areas for grime to build up in.
  • Resale Value: Hand-in-hand with the “Cost” bullet point in the Cons section, these cages maintain their value pretty well in comparison with other cages.
  • Brand Recognition: The commercial value of this product and presence in the industry is pretty solid. This at least means the brand has been somewhat successful long enough to be oft recommended and widely distributed.

CONS

  • Customization/Inability to Prorate Space: As customizable as the inside space of the cage may be, the size of each cage is fixed. That means there are three choices: 1, 2, or 3 unit cages. I can’t, for example, give a little more height to the boys or a little more width to my girls without adding another overwhelming unit to their existing spaces.
  • More Width Than Height: This might seem like a weird point for some people because most cages are wider than they are high, but with custom cages we had the luxury of being able to customize a safe cage with more height than width, which the chins seemed to love and have more fun with. Of course, you could add on that additional unit and make the height appear, but the overwhelming presence! I would like to point out that this Con is also a Pro, limiting falls and height-related injuries.
  • Presence: These cages command attention and space, and definitely carry a presence. A three unit cage would be a little daunting to run into at a friend’s apartment (unless you love chinchillas, which I’m sure most of you do).
  • Loud: FN cages consist largely of bars, and these bars reverberate sound against any connected point, such as hammock hangers, washers, and attached ledges. Any jump or leap will produce more sound than wood, which better absorbs vibrations and sounds.
  • Bars and Biting: Bar biting is really annoying. Not only is it noisy, but it also leaves a mark – yes, chin chewing can easily create indents and grooves in the cage bars’ powder coating. Behaviorally, it’s a bummer to see your chin trying so hard to escape. Wire mesh in custom cages completely prevents this type of behavior.
  • Cleaning Between the Bars: Tough! Dust is the main contender against a totally clean cage situation. Residual dust settles between the bars, and those little nooks are pretty tough to reach and stubborn to clean, even with a high-powered vac.
  • Ferret Nation Quality Control: Leaves a bit to be desired. Some details are offset, door locks aren’t symmetrical, plastic panels that I didn’t use arrived shattered and broken, and there were minor scuffs on nearly every piece of metal. Part of these problems are due to their shipping practices (one large cardboard box and no reinforcement) but must also be due to manufacturing practices and company quality control. To be fair, there’s a limited one-year warranty and FN will replace broken parts, but if there was a higher standard across the board, there would be no need to go through a time-consuming warranty shakedown.
  • Plastic Bottoms and Platforms: I know there’s a profit to be made, but I could never understand why high-volume national suppliers don’t switch to metal instead of providing their customer’s pets with low quality edible plastic, which can cause blockage or worse. From a caring owner’s standpoint, I’d have hoped for a better industry standard by now. Anyhow, I had to order custom metal pans at an additional cost (which were a great investment, and I’m very happy with).
  • Shaking: Although somewhat subtle, the cages will shake from side to side if your chins are running on their wheels.
  • Cost: The cost is relatively high, but as would be a custom cage of a similar size.

Fifi New Cage

The takeaway? These cages are great for our status quo. Make no mistake about it: when the time comes to buy a house in the country, I have grand plans to painstakingly build fully customized cage mansions for each of the chins (blueprints are already on hand). For now, Ferret Nations will do the job, and do the job relatively well. Stay tuned for future posts about FN cage customization! 🙂

Angled Ferret Nation

LY Chinchillas Treat Donation

Donate healthy, delicious treats to LY Chinchillas to help keep our content going!

$5.00

How To: Bond With Your Chinchilla

Here we are traipsing the threshold of 2015, and it’s golden skies and sunny days as far as the eye can see (optimism, optimism!). Instead of writing a post on this year’s reflection (which, if you do want to read, I’ve already written), I’m going to instead share something that could be useful to you and your sweet furry pets in the new year – especially for all you new chinchilla owners. Today’s post will be all about best bonding practices!

There are a few major pointers I’d like to make to cast an umbrella over the whole of this post, which I think are good fundamental rules to follow in the entirety of your relationship with your pet:

  1. Set realistic expectations. Try very, very hard not to idealize your relationship with your chinchilla. A lot of chinchilla owners become disheartened when they learn their adorable new pet doesn’t seem to reciprocate their feelings. Be ready to be disliked or apathetically treated for months! The need for instant gratification is something we have become accustomed to in our society, but it shouldn’t be automatically transferred to human or animal relationships. The crux of good relationships take time, energy, and more time.
  2. Chinchillas are people, too. What I mean by this is, chins have exuberant and specific personalities and great memories. They resemble people in their ability to feel emotion, have thoughts, and hold opinions, although they are not able to express it in ways that appear clairvoyant to humans. Chins are all different, with different mannerisms, idiosyncrasies, and intelligence levels. So to say, not all chins should be treated the same way and it’s necessary to try your best to come to an understanding about who your chinchilla is.
  3. Above all, take your time and stay positive. Anyone who has successfully bonded with their chinchillas will be able to tell you that it’s one of the most rewarding processes and relationships they’ve been able to build. You won’t get there if you give up! It’s brick-by-brick; Rome wasn’t built in a day; take it slow and keep a steady pace with your bonding techniques, and you’ll get there eventually!

Mom Ellen and Koko

Step 1: Introductions! When you first meet your darling chinchilla(s), there will be a great deal of confusion on their end. They’ve likely been through the ringer on the first day in their new home, what with transport, new smells, sounds, and vibrations. Hopefully, their last owner provided you with some of their pellets so you can make an eventual transition to their new feed over the course of several weeks. If not, they’ll have the added stress of a new diet to deal with. It’s important to be understanding during the first few weeks. They will be understandably skittish and scared – but don’t worry, chinchillas are extremely adaptable, resilient, and curious, and will come to know their cage and environment within a day or two. Some owners have found that having a television on by the cage has helped alleviate stress during a move and acted as a distraction for their chinchillas during times of change. In this initial introductory period, you should spend time around your chinchilla, but should not force them to leave their cage or be unwillingly held if not needed. It’s always helpful to speak quietly to your chinchilla in a calming voice, allowing them to become familiarized to your baseline temperament. Once your chinchilla begins to feel safe and the introductory period is nearing an end, you’ll notice your chinchilla approaching you with curiosity and willingness. In some cases, this can happen almost immediately with a very social and friendly chin – in most cases, the process takes much longer, up to several months. In the meantime, it’s time for Step 2.

Mitty Under Couch

Step 2: Develop a Routine! Adopt a healthy diet, dusting routine, and cleaning schedule for your chinchillas. Feeding your chins should be a daily exercise. Free feeding pellets is the way to go; hays and pellets should be re-upped every day to ensure maximal freshness. When you’re in the cage, be sure to say hi to your chinchilla and remind them what a great job you’re doing as a parent. As far as dusting goes, since my chinchillas don’t have dry skin issues and all love to dust, I have a dust compartment separate from their cages that I allow them access to every day. Since it’s a controlled dusting environment and not a free-for-all, I use their dusting time as an opportunity to pick them up, hold them briefly, and weigh them daily. I’ve found that this daily routine has helped me bond with my chin-kids, learning how they like to be picked up, how long they can tolerate a cuddle, and reassuring them that I’m still here for them. Additionally, it’s helpful to objectively weigh their growth – based on water and food consumption and time of day, chinchillas can gain or lose up to 20 grams per day, but as long as the overall trajectory is weight gain and not loss, there isn’t much to worry about. All chin owners know that cleaning is needed almost daily. Deep cleaning occurs perhaps once or twice a week, but some minor tidying is a daily task. During this time, I like to sing to my chins, even though human bystanders insist they’re begging me to stop (I know the truth: that they LOVE it).  The importance of routine cannot be overlooked – it’s the daily interactions that amount to aggregate care. Nobody said caring for a chinchilla was easy, and if they did, they were wrong! It does gets easier though, once you adopt a manageable schedule and supportive network.

Koko Wheatie

Step 3: Playtime! Given your chinchilla is over 6 months old, you can let them out for playtime once or twice a week. Eventually, as long as you have the time and energy to supervise a safe playtime session and know your chinchilla well enough, even daily playtime is fine. I’d suggest starting out in a bathroom or closet for 10 minutes at a time, sitting with them and allowing them to learn and explore the space before moving on to a larger area. To read more about playtime tips, read this post. Not every chinchilla is fond of playtime, some prefer their cage. However, playtime is always a great way to boost trust and confidence in one another, getting to know your little friend through exploration. The more attention and interaction you give your chinchilla, the better their quality of life and the more satisfied they’ll be in their home. Boredom can be a killer for any species, especially for intelligent, active, caged chinchillas. Stimulation is critical for their health and happiness – physical activity can help ebb the issue of containment or inactivity. Hopefully, in addition to a great playtime, your chinchillas have access to a large, spacious, and fun cage where they can explore, chew, and entertain themselves during your off hours. If not, you can look into building your own cage for them! It’s a lot of work, but a lot of reward as well.


Step 4: Lots of Love! There are a plethora of ways to continue on the bonding process. Offering scratches to your chinchillas behind the ears and under the chin can be a great way to bond! For chinnies that don’t want to be scratched, chew toys are always a great peace offering. Teaching your chins that you feed them, bathe them, and treat them helps to develop a great maternal or paternal relationship with your chin-kid. Essentially, any amount of quality time spent with your chinchilla serves to improve human-chinchilla relations, bringing you and your chin closer each day. It’s the little successes that often make us happiest, since these little critters can’t speak or sing or shout about how much they love us. There’s really nothing that can replace the time and energy spent towards great care. We can only do the very best that we can do. Your chinchillas will come to respect you and appreciate you, and simply take you for granted. But, isn’t that just the joy of it all anyhow? You see, that’s the ultimate takeaway from all the hard work that goes into bonding with your chinchilla. You’ve just come to the end of this lengthy article on bonding, but the truth is, if you are a great pet owner, you’ll do everything you can for the animals you love, expecting absolutely nothing in return. Just safety, health, and happiness! That’s our motto – Happy 2015 ya’ll!

Muff 2015 2

Don’t forget to keep in touch with us – YouTube, Facebook, Instagram andTwitter! Follow us into the New Year! 🙂

LY Chinchillas Treat Donation

Donate healthy, delicious treats to LY Chinchillas to help keep our content going!

$5.00

How To: Build a Custom Chinchilla Cage

This week’s post will be all about how to build your own custom chinchilla cage! Since last week’s post, I’ve had many inquiries asking how I built my own cage and the step-by-step process involved. So let’s get to it!

There are a few things to remember prior to making this decision:

  1. Building your own cage is NOT less expensive than buying a quality pre-made cage. In fact, it often runs more expensive in terms of items needed and time spent designing and creating the cage. Our cage cost roughly $600 to construct, and that’s an ongoing number as we continue to modify and improve it.
  2. Knowing your chinchillas well or caring to know about them well is critical to building a successful cage (although there will be many things you’ll learn about them as they discover new spaces). The whole purpose of custom building is to allow your chins exactly what they want and prefer out of a home, so it’s best to keep that in mind when making it the first time around.
  3. This process is extremely time and energy consuming, so it’s best to team up with someone that has some patience and strength! We built our cage in a single day, but we also were incredibly motivated at the time.

Step 1: Gather tools!

For the foundation:

  • Wardrobe unit or sheets of kiln-dried pine, fitting for your space and preference
    • Minimum unit size per chin should ideally be a 3 foot cube; when constructing your own cage it’s beneficial to offer them as much space as possible. Our single units are approximately 4 feet x 3 feet x 2 feet. We would love to give them each a much larger home, but we do live in NYC and have four full units for five chinchillas.
  • Jigsaw, chop saw, or skill saw
  • Hole saw, 4” diameter or larger
  • Drill with self-tapping screws, from ½” to 2” long
  • Drill bits of various sizes, from 1/8” to ½”

For the screen:

  • Mesh wire, ¼” or ½”
  • Wire cutters
  • Carpet trim, metal or wood

For the inside:

  • Kiln-dried pine for constructing ledges and platforms
  • Tubes
  • Hammocks
  • Food Bowls and Hay Racks
  • Dust houses
  • Chinchilla-specific huts, toys, and wheels
  • Granite or marble slabs

For the lighting (if you should choose to include):

  • Light fixture
  • Extension cords
  • Staple gun with ½” long staples

Accessories:

  • Lock
  • Bungee Cords
  • Thermometer
  • Water bottles

Step 2: Construct & Deconstruct the Foundation

This would be a lovely time to create a design for your chinchillas. Depending on how many single units you want to fit in your chinchilla complex, you’re going to have to make some decisions. Who goes where, what they love, who wants to jump, who likes to be lazy, etc. If all your chinchillas are amicable, I’d suggest creating something that could potentially be sectioned off into different levels later on, should any disharmony come into the group.

It’s important to note that most wardrobes purchased at most stores are wood veneer covered chipboard. It’s not ideal – the most ideal wood to use would be kiln-dried untreated pine. However, in my experience, my chinchillas will chew platforms and ledges prior to their cage frames.

So, take a look at the wardrobe you’ve selected. It’s time to mentally construct and deconstruct this guy! You’ll need to keep the frame but remove as much of the walls as possible in order to ensure maximal wire mesh coverage. This is so that your chins have a breezy complex that allows the passage of air through their living space at all times. It’s important for chins to have fresh food, water, and circulating airflow. I try to keep it all very zen and health-conscious in that way. In order to accomplish this, there will need be a sturdy frame and pillar or sections to keep the cage sturdy.

You’ll need to decide the overall structure of the frame prior to assembling or disassembling. It’s best to start out with drawings or sketches, and change as needed if you hit certain roadblocks. Once you’ve made up your mind, you can cut out the front walls, construct the cage and begin to remove certain elements.

The first physical step will be to cut out the front of the cage. The front walls are typically doors, so you’ll need to use a saw and remove the meat of the doors, leaving a frame which will be fitted with wire mesh. The best way to secure mesh is to start tightly from one corner and work your way out, securing with screws as you go in both directions.

Then, you’ll need to construct the frame of the cage, leaving out the back panel. Typically, it will be the back walls that will go completely and the shelving that will stay in some way. You can remove the entire back before it has even been affixed and fit it with mesh instead.

The side walls and ceiling, after the frame is constructed, can contain many unique window cutouts that can be fitted with wire mesh or plexi from the outside. All wire mesh should be affixed from the outside, so that your chinchillas will not have access to biting the sharp edges (which can’t help but stay sharp unless you weld it in some way). Same with plexi, as eating plastic is never chin-healthy. Luckily, some of my chins have an aversion to eating plastics, so based on my personal experience with them, I allow some to have plexi platforms.

As your cage comes together, you’ll notice that the wire mesh is quite unsightly. To solve this, you can purchase lengths of carpet trim in either metal or wood, whatever fits with your theme best. This will serve to cover the edges of the wire mesh, also helping to secure them neatly.

So, at this point, your cage should be fully structurally sound and fully formed. It’s all about moving on to the inside of the cage and personalizing for your little babies.

Step 3: Interior Design

Platforms first! Getting the larger basics down will help section off your space and make for safe, fun levels. I suggest keeping platforms 6-8” apart height-wise just for safety. Any higher, and a fall could potentially hurt your chin. Also, platforms should be around 4-5” wide. Platforms can be secured from one side to the other, or just act as a large ledge protruding from the left, back, or right of the cage.

Don’t forget ledges! Fun rounded shapes for corners, sides, and all around. Sizes can vary, from 3″ upward. We started with cutting a plethora of ledges or preparing appropriate chin-safe wood branches and then went around, screwing them in with hardware from the outside.

Personally, I never worry about ledges or platforms getting dirty or worn down. Kiln-dried pine is relatively inexpensive and easy to replace when you have a custom-built cage, so the chins are encouraged to destroy and munch as much as their little hearts desire.

Great things to incorporate into your cage are bedding pans! I’d suggest powder-coated metal with a drawer mechanism, although for now we are using Vitakraft ECO bedding and creating little litter corners for the kids. It works for us for now; we have had a tough time finding custom pans for the kids, so we’ll wait until we’re ready to create custom metal pans.

For our cage, we went with aluminum tubes – my chins don’t even show the slightest interest in chewing metals (although if yours do, this is not a safe option). They’re very sturdy and a year in, they look as new as the day we got them. There are many different sizes and shapes for chins who love to cuddle or just relax on their own. I know many people use fleece-covered PVC or cardboard tubes; that’s a great addition too.

Fun additions are little chin-holes for traveling between units! This works great for chins who want a little space from a friend, or some time to reflect on which unit is their favorite. We did this for our kids early on; when they became inharmonious together, we simply closed off the adjoining holes and brought back some peace to the family.

As far as food provisions go, we use PVC tube coverings (they look like little bowls) with a screw through the bottom, which then connects to a drilled hole at the bottom of their cage. The bowls are easy to remove and stand-alone, which is pretty cool. Everyone except Muff gets this PVC, because they know not to chew plastic. Muff, on the other paw, has a glass bowl for his food. We still use physical glass bowls for hay, because our chins don’t have any respect for hay racks.

We also screwed down a few slivers of pine to affix granite slabs in their place, so they can freely be placed on a platform without a worry of being shifted. We have never had a problem with our chins and screws, because we use a countersink method (which means the screw falls flush or deeper than the wood).

Hammocks, huts, wheels, and toys are final additions for the kids. Some use these items more than others; it’s a great chance to personalize each area for each chinchilla. I personally don’t let them have individual dust houses, but that’s only because their cage is in our living space (so it would be wildly messy – even more-so than the crazy cleaning schedule we have now) and I also enjoy handling and bonding with them each and every day when they receive their dust baths. It’s a nice daily ritual we have, and it works for us.

Step 4: Lighting and Accessories

We’ve tried a few different lighting techniques for the cage. It’s easy to lose the kids in a dark background (especially if your chin’s fur is dark as well), so lighting is a great option if done safely. We always use low power LED lights that don’t generate any actual level of noticeable heat, fixed to areas that the chins can’t reach – such as the cage ceiling or on the outside, near but not on a window. The lights we have now have a switch for easy on/off. We use extension cords to power the lights and used a staple gun to adhere the wires flush to the outside of the cage, creating a clean look. We always unplug the light if we aren’t using it, or are out of town for a day or two.

Finally, we have bungee cords at the top and bottom and a lock in the middle! The bungees are to keep the cage doors flush and quiet when they wall jump; the lock is to keep the entire cage secure. Also, there are two glass water bottles adhered to the outside of the back of each cage unit, just in case one water bottle goes wonky. We also placed a thermometer on the cage so we know exactly what the temperature of their environment is, and can adjust accordingly. We never let the room get higher than 75 degrees Fahrenheit.

Step Five: Kick Back and Enjoy!

So, there you have it! The long, arduous, and very rewarding process of building your own custom chinchilla cage! It’s incredibly easy to make changes to your cage once it’s up and running, and your chinchillas will never look back at their old cages. It’s not for everyone, and it’s certainly time, energy, and money consuming, but it’s a really great experience to feel as if you’ve given a part of your creativity and design to your babies. Admittedly, there are many different avenues to feel this way; this is only one!

Be sure to follow the blog by signing up via email, subscribe to us on YouTube, Facebook, Instagram, and Twitter! Requests for our Weekly Wednesday Blog Post topics can be submitted through any social media outlet, via lychinchillas@gmail.com, or directly through the blog!

We leave you with a sweet donation opportunity and wish you a wonderful holiday week!

LY Chinchillas Treat Donation

Donate healthy, delicious treats to LY Chinchillas to help keep our content going!

$5.00

Custom Chinchilla Cages

This week has been busy! I’ve been all around the city, catching up with old friends, meeting with clients, and planning for the holidays with the fam. Needless to say, it’s been full of fun and festivity. One major thing I’ve set out to accomplish prior to the new year is to re-customize our custom chinchilla cage.

Chinchillas love change! To encourage mind and body stimulation, I love to move around parts of their cage from time to time – and that’s the best part of having a custom built cage. Everything can be modified simply with new pieces of kiln-dried pine (or other chinchilla safe woods) and just a couple of screws! Since each chin is different, getting to know your chinchilla is critical when it comes to modifying their cages and allowing them the safest & funnest habitat possible.

Cage 2013 2014

Last year, my boyfriend and I custom-built a cage based on the size and preferences of our chinchillas. For most of 2013 into 2014, we had only four chins, so the single custom armoire cage made perfect sense. When Koko came along in the latter half of 2014, we modified and combined two smaller wire-based cages to create a spacious multilevel loft for Mufftoneous (it was best at that point to separate the boys from the same cage complex). Prior to that point, we had a few wire cages in storage and the other as a playtime wheel for the kids, containing a water bottle and wheel for free use. Now, we keep the wheel with Muff because he has been deemed the unstoppable athlete – everyone else gets their energy out at playtime, but Muff just keeps going like the Energizer Chinchilla.

Below, you can see the most recent updates to our cages:

Over the course of the year, there were many small changes and modifications to all cages. But the desire to switch it up even further has officially arrived. So, onward! The process we use to make changes to the cage involves taking the chins out one by one for playtime and modifying cages one at a time. Typically, I start with the oldest chin’s space and work my way to the youngest, although there are always slight aberrations to that selection method. Since I constantly observe my chins in their environment, I have noticed their changes and preferences as they get older, bigger, and more curious. Their cages have always been able to be a reflection of their personality, and I’m happy to be able to be hands-on with it.

Since Mitty [located in the bottom left tripartition] loves organization, he received a few large shelves, VIP bedding area, and a custom house (not pictured). He was also given Muff’s hammock, since Muff used it more as a platform than a relaxation tool. Muff [located in multilevel wire cage] had that hammock replaced with sturdy pine shelving in large and small sizes to keep him entertained. Since I know Muff loves wall climbing and tight spaces, he received a long pine wall to scale and squeeze himself up and down (don’t worry, it’s not too tight). Lulu and Fifi [located in the bottom right tripartition] received a spacious 3-way aluminum tube so they could snuggle together and new platforms to stretch their legs on. Finally, Koko [located in the top tripartition] received Mitty’s old hut and the girls’ smaller tube. She also got a few small ledges to prance around on – she’s not a jumper, so height has never been her preference.

We had a great time modifying our kids’ cages this time around, and it’s always an exhausting pleasure being put to work by the chinchillas! I know they’ll be happy for a few weeks to come. Remember, a chinchilla owner’s job is never truly done – it’s onward, and upward, always!

Stay tuned for our weekly Wednesday blog posts by following via email. Also, subscribe to us on YouTube and visit us on Facebook! We leave you with a sweet video and we hope you all have a great holiday, and spread that furry chinchilla love to your friends and family. Cheers!


LY Chinchillas Treat Donation

Donate healthy, delicious treats to LY Chinchillas to help keep our content going!

$5.00