kiln dried pine

Our Favorite Chinchilla Topics!

Over the year, we’ve had some great topics and fun things to write about! Located on our Favorite Topics page, we wanted to share with you our most poignant and important posts that have helped out our furry friends and their owners the most. The entries are linked so you can click through and read whichever article you find most helpful!

ft page lulu cutie


What’s a Chinchilla?

ft page meemau

Chinchilla Health

Chinchilla Care

Chinchilla Food

ft page muff hammock

Custom Chinchilla Cages

Chinchilla Cage Accents

1 blog fifi eye

Chinchilla Playtime

LY Chinchillas: About Us!


ft page koko chubby

As always, don’t forget to reach out and stay in touch with LY Chinchillas on social media! We’re on YouTube, Facebook, Instagram, Vine, and Twitter!

We’ll be sure to update the Favorite Topics page as time goes on, so don’t forget to leave us some commentary and follow the blog! 🙂

How To: DIY Chinchilla Hanging Toys

Hanging toys: the cutest, most heartfelt way to watch a chinchilla struggle without a twinge of guilt! They’re also dental-friendly treats that keep your fluffs engaged and entertained during long work or school days. I love chinchilla-safe woods and chews because they are a fabulous non-food way to make your chins happy and show them that you care – not that they need even more from you to be spoiled with! But really, just one more chew toy couldn’t hurt.. (and seriously, it couldn’t!) 😛 So, today’s post is all about how to make DIY hanging toys!

Lulu Fifi Lady Hanging Toy

There are only a handful of tools that are needed to make a very simple hanging toy:

  • Chinchilla-Safe Woods and Chews, 6″ or Smaller
  • Drill with Thin Drill Bit
  • Solid Craft Wire or Pliable Metal Wire
  • Hook to Adhere Toy to Cage Bars
  • Pliers to Cinch Wire Ends
  • Wire Cutter or Strong Scissors to Cut Wire

Craft Wire Drill Wood

The first step is to gather your goods! We use apple sticks, pear sticks, chunks of pine, and vine twirls – but some all-time favorites include natural loofah, blocks of pumice stone, shredder tape, and more! Feel free to read about chinchilla safe woods and chews to get some ideas for your own custom toys. Over time, you’ll come to realize which woods or chews your chins prefer. Another great tactic is to use the barkless wood that your chins have already partially demolished; it’s a thrifty way to re-purpose the seemingly unwanted sticks (they’ll be slower to go at them, but they’ll begrudgingly get to it eventually). Then, I drill through the center of the wood, but wood vendors tend to sell pre-drilled wood for easy toy-making.

wood and fine toys

The next step is to cut your wire to the desired hanging length, adding on a little extra just in case. I typically cut the wire to 12″ and remove any extra length prior to finalizing the toy. It’s important for your wire to be made out of a solid metal to dissuade exploratory chewers (although they’re typically too preoccupied with the hanging toy to consider munching on the wire). Another great way to put your mind at ease is to either fill the wood to the very top so that there is no exposed metal, or to hang the toy strategically so that the exposed area is not reachable. I have seen other varieties in toy-making such as seagrass or chains, but it ultimately depends on what you know to be the safest, best option for your particular chins. So far, there have been zero issues with our construction and the final products are spot-on for my five furry babies.

Muff going for his chew toy

For the top of the toy, I’ll wrap the wire tightly around the hook, using pliers to tuck the edge away. Since we go through faulty glass water bottles every few months, I make sure to keep the hardware for hanging toys – the hooks are perfect for the cage bars, because they’re made for just that! Another good alternative would be shower hooks, as they’re self explanatory and easy to work with.

Water Bottle Hook and Pliers

The funnest part for me is next: to string all the toys on the wire in my favorite order! I like to mix up the different woods and chews to offer some variety for the chins – plus, they look really nice when they have some diversity to them.

Mittenmaus Hanging Toy

The trickiest and final part is to close off the hanging toy. If you’re using a thicker wire, you can simply use pliers to close off the toy in a “U” with the wire and call it a day. Using a thinner wire is easier to work with initially, but is a tad tougher to close off. The way I do it is to string the wire through the last stick – enough slack for the wire to wrap around the stick twice – and thread the wire through the hole a second time, pulling the wire flush to the stick. Because this type of craft wire is so malleable, it will secure itself easily after being pulled and be unable to be readjusted without pliers. The last step is to cut the excess wire flush with wire cutters or strong scissors (although after a certain amount of practice, you’ll be able to calculate the perfect amount of slack not to need to cut the wire at all).

Drilled wood and secured wireSecured wire in drilled wood

And voilà! There we have it – hang away and watch your happy chinchillas struggle with sheer delight! 🙂 The more toys you make, the more endless variety you’ll find that there is! You can make toys in all different sizes and shapes – the fun is being able to take some time out of your day and do something that takes your mind off of how much money, time, and energy you spend on your chinchillas by creating something lovingly by hand for their spoiled enjoyment!

Koko Hanging Toy

LY Chinchillas Treat Donation

Donate healthy, delicious treats to LY Chinchillas to help keep our content going!

$5.00

Chinchilla Cage Accents

Muff hilarious face tube

In tandem with recent posts about Ferret Nation Cages and How To: Build a Custom Chinchilla Cage, this post is all about cage details – all the necessary components that help make your chin’s cage feel like a meaningful, functioning home! Although there are online vendors for listed accessories, all items that are realistically able to be made at home have been described in a DIY manner.

Ladies cage

Platforms & Ledges: I suggest keeping platforms 4-5″ wide, installed under 6” apart height-wise for safety. Any higher, and a fall could potentially hurt your chin. And don’t forget ledges – fun shapes for corners, sides, and all around. Sizes can vary, from 3″ upward. The hardware part is simple: screws, washers, and a drill will keep your items snug and secure.

LYC Hay Feeder

Hay Feeders: Hay is an integral part of any healthy chinchilla diet, and it gets everywhere! Our cages have DIY hay feeders, complete with a standing perch for easy eating. Connected with two sturdy hooks, these feeders are a chin favorite, adhere to horizontal bars with ease, and keep the mess minimal!


Food Bowls: We recently switched from bottom-heavy bowls to stainless steel bowls that adhere directly to cage bars. It’s been a wonderful transition, as the stainless steel bowls are sleek, safe, attractive – and most of all, easy to use.

Koko litter box

Litter Boxes: Read this post all about DIY litter boxes and litter training! Litter boxes can be a tidy addition to your chin’s cage, encouraging your pets to maintain their space and keep clean. Of course, not all chinchillas can be litter trained, but it never hurts to try.

Muff Home

Huts & Houses: The fluffs love hiding houses, tight corners, and crunching down on the very infrastructure they inhabit. The best way to inhibit this type of behavior is by encouraging it in a safe, healthy manner! Our hideaways are made from kiln-dried pine and offer privacy-seeking chins a lovely respite from the craziness of their peaceful environments (because we all know being a well-cared-for chinchilla is exhausting). 😛

Mitty Granite Marble Tile

Stone Cooling Tiles: Our chins prefer marble or granite cooling tiles; they are a great accessory for the active buggers who dart all over their cages, working up some heat! The tiles offer temporary relief for warm tummies, but only act effectively if hand-in-hand with low temperatures or air-conditioning.

Girls Cage Toy Bowl Hay

Hanging Toys: Hanging toys are quite simple to make, and shockingly fun to watch as your chins swing them from side to side in impatient demolition attempts. Some drilled apple sticks, chunks of kiln-dried pine, and pumice stones make for a really great time – especially for the attention deficit types!

koko hammock

Hammocks and Tubes: While not every chin enjoys hammocks, a lucky few really do love lounging in comfy floating fleece blankets. There’s nothing like a softly swinging sleepy chinchilla to bring a smile to your face! Tubes are also great accessories, offering a round retreat for your fluffballs. I use galvanized steel ducts, which have rounded steel that can be used safely without fleece coverings. Other tube options include PVC or cardboard tubes with snug fleece covers to prevent harmful ingestion.

Muff Heart

Cuddle Buddies: Fleece teddies can be perfect for solo chinchillas! As long as the cuddle buddy has fine stitching and good construction, your chin will be snuggling up next to their new friend (or tossing it around) in no time.


Water Bottle: Water bottles are the bane of my existence. As I’m living in the city, I do not have an adequate setup for a water pump system. So, I run through glass water bottles every few months. I always have two water bottles in each cage, a 32 oz. and an additional 16 oz., just in case. Currently, I use Kaytee, Living World, and Lixit (although I’ve tried more than a handful of brands), and simply cross my fingers. I have never understood why water bottles do not have any type of manufacturer’s warranty, as they are often faulty and fail to stand the test of time.

Ladies FN

Running Wheel: Although chinchillas do not require a wheel, it is nice to have one for exercise purposes. My chins have a running wheel in a separate playtime cage, which is an excellent way to encourage a weekly allotment of exercise while teaching them to manage their stress when being introduced to different environments.

Koko Fleece Cage

Fleece: The safest fabric for chins, fleece is a good way to cover up harmful plastics in your cage or line the bottom of your cage with a pretty pattern. While fleece is not necessarily easier to clean than bedding, it does help make your chin’s home more personal. If your chin is litter trained, I suggest washing fleece every 2 weeks with a hot water and lemon juice/vinegar mixture. If your chin is not litter trained, fleece should be washed weekly to prevent urine buildup. It’s important to note that while most chins do not eat fleece, some will try! If that’s the case, then fabric should be removed immediately to prevent consumption.

Mitty pan

Custom Steel Pans: Galvanized or stainless steel pans for your chin’s cage are an awesome investment – they are easy to manage and long lasting with proper care. Swapping out plastics for steel is a simple way to prevent harmful ingestion, blockage, or impaction that can come with gnawing malleable plastics.

Ko ball

As always, try to incorporate safe woods into your chin’s environment, and understand the importance of choosing wood over plastic. Be sure to always have an air-conditioning unit (or two!) during warm months, keep a regular dusting routine, and monitor your chin’s weight for changes in consumption in order to catch early warning signs of illness. 🙂

Mitty tail tube

LY Chinchillas Treat Donation

Donate healthy, delicious treats to LY Chinchillas to help keep our content going!

$5.00

Plastic is Bad, Wood is Good!

When it comes to chinchilla care, all owners understand – or will eventually come to understand – the negative risk associated with plastic consumption. It’s too easy to turn a blind eye to this issue, as pet stores and manufacturers across the world push its occupants towards plastic for an obvious profit. It’s cheap, easy to produce en masse, and nearly indestructible – except when it comes in contact with a determined set of chinchilla chompers. Today, I’m raising my digital paws to the sky and asking all chinchilla owners to please – for the love of fluff – switch to a chinchilla-safe wood alternative.

Mitty Home

Plastic consumption can cause blockage or impaction in a chinchilla’s digestive system, causing discomfort, pain, or even death. Sure, we’ve all had experiences of miraculous chinchilla digestion: for example, Muff, why are you drawn to chewing fabric? Why does it enchant you so? Why must I chinchilla-proof my outfit before handling you? 😉 I will say that my chinchillas have had their share of quirks and unsafe behaviors, but their mishaps are always recognized, seriously addressed, and prevented until the behavior is eventually resolved. But the simple relief of your – or my – chinchillas being safe after an unsafe behavior is no indication of future success. Yes, plastic can kill your chinchilla. I mean, it probably won’t, but it can. And putting your chinchilla in a potentially dangerous situation when you have the power to chinchilla-proof their living and playing space is simply unnecessary. As good owners, it is our responsibility to take the care of these fluffy lives very seriously and get rid of the plastic.

But how can we go on? How do we really live in an affordable manner without plastic? I mentioned in my Ferret Nation post that when it comes to cost-effective production, the small animal industry too often turns to plastic. Outside of cage fabricators, there are also major manufacturers pushing cheap dust houses, running wheels, litter boxes, hideaways, water bottles – plastic, plastic, plastic. As small of a media sector as there is for the small animal community, we need to stop listening to the part of it that is telling us to put perceived low cost and ease of purchase over the health and well-being of our animals.

Koko Sleepy Ledge

The answer is, we need to shop differently and stop the flow of plastic consumption. Stop by Home Depot or a lumber supply, grab some cheap kiln-dried wood, screws and washers, and learn to make some simple things for your chins. And yes, it is actually cheap – as cheap or cheaper than plastic, and far more healthy both in the interim and long-term. Another DIY option is to cover plastic items tightly in fleece, a safe way to modify existing plastic items. A great way to think about improving your chinchilla’s environment is to look at the process as a positive bonding experience – a way for you to give your energy to your fluffy child in a way that they can truly appreciate. As chin owners, we really don’t get to experience a silent cuddle without any signs of struggle, so watching your chinchilla enjoy their well-made home is truly an expression of appreciation for all the work that you’ve done. And yes, we know that you have done a lot of work, and the work ceases to end, especially if you’re doing a great job.

Ladies Cage Wood Ledge

Or, a less energy-consuming alternative: find a vendor that makes safe chinchilla ledges, platforms, houses, and accessories. There are plenty of great home-spun chinchilla vendors that put a lot of work and energy into making some beautiful accents for your chinchillas so you don’t have to! I will note, however, that when energy goes down for the end user, cost will tend to rise: the cost of purchasing from these vendors is almost always at least double the cost of producing these goods yourself (although a lot of people don’t want to make the initial investment of purchasing a drill, saw, and other construction materials needed to start on projects that require energy and attention, which I also understand). But honestly, if you aren’t going to break out the tools and do it yourself, by all means – buy from these vendors. It’s a higher cost than plastic, sure – but it is invaluable for your chinchilla to have that safe, healthy environment that he or she needs. The investment is not short-term, and it’s important not to lose sight of that.

Muff Home

Since the chinchilla pet owning market has not really spoken out against plastic in mainstream commercial avenues (i.e. endorsed by major chinchilla-selling pet stores) most creators of chin-safe goods will be sold at a premium. The more we evolve and begin to understand the chinchilla on a national scale – their complexities, individuality, health requirements, and all the basics – will we begin the full evolution of a safer, inexpensive, more comprehensive chinchilla market that gives our fur-babies exactly what they need, at a cost that won’t break the bank.

We already do so much for our chins, the least the industry could do is recognize and proliferate the true requirements that chinchillas need so as to promote ownership that is not ignorant for a lack of preliminary information. Ignorance will continue in each and every pet kingdom, that’s just the unfortunate truth. However, we should do our best to dissuade unfit owners through education and knowledge. I know the knowledge is out there, and amazing owners and breeders contribute to the chinchilla society, but too often the contributions are laced with a high-strung attitude about best practices. Don’t get me wrong, I’m not a person without opinion, and I definitely feel that there are a great many ways how to raise a chinchilla and a great many ways how not to. But I think there needs to be an open dialogue with the community – chinchilla owning and not – about chinchilla ownership and coming to an understanding of general chinchilla needs, and having that conversation turn into a pedestal for future expansion of the industry. The lack of a centralized commercial understanding of chinchilla care – or the willingness to promote bad care in exchange for profit – is unacceptable.

Hay Feeder 1

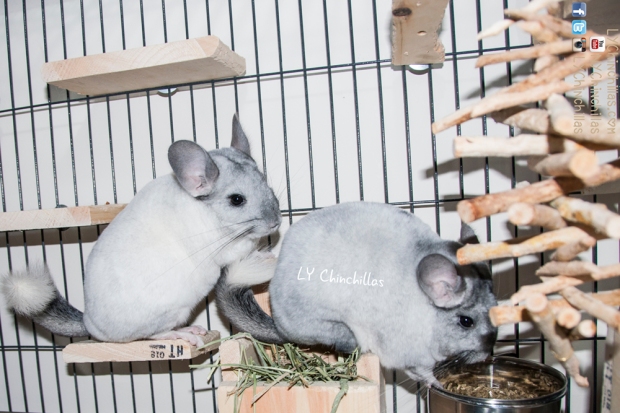
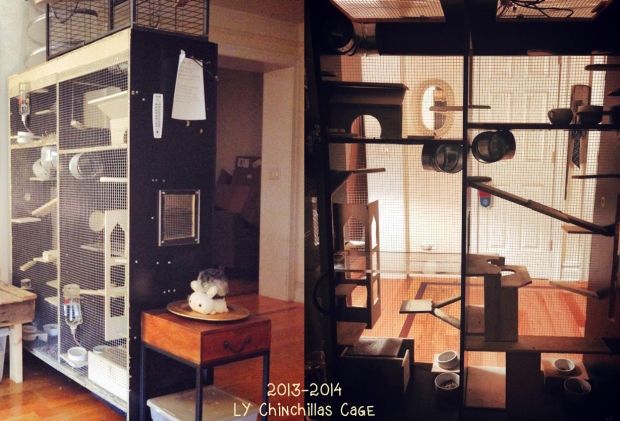
For my chinchillas, I make everything out of kiln-dried pine, from litter boxes to hay feeders to ledges, platforms, and toys (toys are often made from a variety of vendor-purchased pear or apple woods). I use stainless steel bowls, glass water bottles, and metal pans with fleece covering as a replacement for the stock plastic components in my cages. But then again, I’m just one loving chinchilla owner, and I can only do so much for the community at large. Chinchilla education starts with you, learning and sharing and learning again. There’s an endless ocean of information out there, and it’s spectacular. I spend a lot of my free time reading and learning and searching for more, for the simple reason that I care about chinchillas and would like to know more. Don’t be afraid to be wrong, but always try to fix your mistakes and practice great caution before making any decisions or setting your mind to some half-fact that could negatively impact your chinchilla. Knowledge is always power: the type of power that leads to a happy chinchilla home. Also, don’t get discouraged if you can’t do everything at once: making improvements is a process that expends time, money, and energy. You learn about what works best for your chinchilla, making positive changes whenever you can.. and every step counts.

Providing a happy home is, above all else, providing a healthy home. The happiest home is an environment that allows your chinchilla to explore their personality, growth, and development in a space that fosters and caters to their safety and health. I urge all owners to get rid of plastics inside your chinchilla’s cage and replace them with delicious, crunchy, dental-health-promoting chinchilla safe woods! 🙂

Muff Sleeping Litter Bxo

Muffton sleeping like a baby in his safe wood litter box! He might not use it as he should, but enjoys it all the same!

LY Chinchillas Treat Donation

Donate healthy, delicious treats to LY Chinchillas to help keep our content going!

$5.00

How To: Build Pine Litter Boxes

Litter training a chinchilla is possible, but success depends on your chinchilla’s personality. A chin that likes order in their home will typically be well-receptive to training, whereas the more throw-caution-to-the-wind personalities might not take to litter boxes quite as well. Still, there are a few tips that may help the success of training – the most important of which is the litter box, repetition, and consistency. Of course, the training we’re talking about is for #1 only! 😉

Boxes

So, while I’m in the process of changing cages (yes, it’s happening and no, I’m not entirely sure how I feel about it yet), I decided to re-imagine my litter boxes. In my custom cages, I had pseudo litter boxes, sectioning off a corner of each cage with pine frames and filling it with chinchilla-safe bedding. My favorite bedding is Eco-Bedding: a safe, recycled bedding that resembles crinkled recycled paper (or, actually, that’s exactly what it is). The chins have been using it for so long that they no longer have any impulse to snack on their bedding. Anyway, I’d decided a while back to construct pine litter boxes in place of the faux box structure, and this is what I came up with!

Litter Box

Step 1: Tools!

  • Kiln-dried pine. For each box, I used 2 pieces at 6.5″ x  .75″ x 1.5″ and 2 pieces at 8″ x  .75″ x 1.5″ – however, any lengths that will form your desired shape (triangle, square, rectangle, etc) will work. Try to make sure the surface area is high in relation to the height, so that it would be very difficult for your chin to flip the box over. Use a jigsaw to cut the wood to your desired lengths.
  • Drill & Screws
  • Cardboard & Box Cutter
  • Staple Gun & Hammer
  • Eye Hooks / Alternative: Machine Screw, Wing Nut, and Washer

Tools Box

Step 2: Construct!

With a drill, screw your pine pieces together to create your desired shape. It’s best to use a countersink method, which better hides the screws in the wood. After creating your shape, outline the box’s perimeter against a piece of cardboard and use a box cutter to cut the shape out. Use the staple gun to adhere the cardboard to the bottom of your box, using as few staples as possible to achieve a secure bottom. I use one staple in each corner and then hammer them in to make sure they are secure and impossible to remove without a screwdriver and some leverage. Finally, I use a drill to make a small hole on the side(s) of the box and insert the eye hook(s), which keeps the litter box secure to the cage corner. I use potential plurals, because cages can be different and may need more than one hook to stay in place. I have found that one hook works fine in my cages, because the bars are 1″ and the hook width-wise is 1.25″, meaning the hook would have to be turned vertically in order to be removed from the cage. However, an alternative is using a wing nut, washer, and machine screw – a common technique for removable shelving and other chin items.

Hooks

Step 3: Set Up!

The best way to introduce a litter box is to secure it to a corner of your cage, filling the box halfway with clean bedding and topping it off with soiled bedding. Since chinchillas have excellent sense of smell and smell is tied heavily to memory, the scent of their soiled bedding will encourage them to return to the same place to urinate. Of course, some chins will dig all the bedding out and trample all over it – the best way to move forward is simply to place the bedding back and continue to encourage the use of the box. It may take a few weeks, and it’s possible that it simply may not work for your chins, but the only way to know for sure is to keep going and display consistency as an owner. The cardboard will have to be changed out every 1-2 weeks, but it serves as an absorptive layer that retains scent and reinforces the training – and also tracks progress. Of course, you could use wood as a bottom, but all organic materials will also require changing out over time. To start off and build a new habit, the cardboard is a great and inexpensive way to encourage repeat behavior. A side note: please watch for cardboard ingestion. At the dimensions and with the installation of my litter box, it’s not possible for my chins to flip the box in order to reach the cardboard, but depending on your shape and method of adherence to your cage, cardboard ingestion could be dangerous and lead to blockage.

Koko Cutie

Step 4: Monitor!

Accidents will happen, that’s expected. When they occur, be sure to clean up the area well enough to remove as much of the scent as possible. Keeping all soiled bedding in the litter box will be the key to eventual success! Of course, there is no one solution for individual chins, but this method has worked for most of my chinchillas, and is continuing to show signs of potential success in the stubborn ones (cough Fifi and Muff). 🙂

Fifi Smiles

Have a great week, all! I’ll be writing about my transition into Ferret Nation cages as soon as I’m able to formulate a solid opinion on the change. 🙂 Cheers!

April 2015 Update: I have switched the cardboard bottoms out with kiln-dried pine! Over time, it became clear to see that the maintenance of cardboard was too frequent to be efficient. Pine will have to be switched out every several months, as opposed to every week with the cardboard bottoms. 🙂

LY Chinchillas Treat Donation

Donate healthy, delicious treats to LY Chinchillas to help keep our content going!

$5.00

Custom Chinchilla Cages

This week has been busy! I’ve been all around the city, catching up with old friends, meeting with clients, and planning for the holidays with the fam. Needless to say, it’s been full of fun and festivity. One major thing I’ve set out to accomplish prior to the new year is to re-customize our custom chinchilla cage.

Chinchillas love change! To encourage mind and body stimulation, I love to move around parts of their cage from time to time – and that’s the best part of having a custom built cage. Everything can be modified simply with new pieces of kiln-dried pine (or other chinchilla safe woods) and just a couple of screws! Since each chin is different, getting to know your chinchilla is critical when it comes to modifying their cages and allowing them the safest & funnest habitat possible.

Cage 2013 2014

Last year, my boyfriend and I custom-built a cage based on the size and preferences of our chinchillas. For most of 2013 into 2014, we had only four chins, so the single custom armoire cage made perfect sense. When Koko came along in the latter half of 2014, we modified and combined two smaller wire-based cages to create a spacious multilevel loft for Mufftoneous (it was best at that point to separate the boys from the same cage complex). Prior to that point, we had a few wire cages in storage and the other as a playtime wheel for the kids, containing a water bottle and wheel for free use. Now, we keep the wheel with Muff because he has been deemed the unstoppable athlete – everyone else gets their energy out at playtime, but Muff just keeps going like the Energizer Chinchilla.

Below, you can see the most recent updates to our cages:

Over the course of the year, there were many small changes and modifications to all cages. But the desire to switch it up even further has officially arrived. So, onward! The process we use to make changes to the cage involves taking the chins out one by one for playtime and modifying cages one at a time. Typically, I start with the oldest chin’s space and work my way to the youngest, although there are always slight aberrations to that selection method. Since I constantly observe my chins in their environment, I have noticed their changes and preferences as they get older, bigger, and more curious. Their cages have always been able to be a reflection of their personality, and I’m happy to be able to be hands-on with it.

Since Mitty [located in the bottom left tripartition] loves organization, he received a few large shelves, VIP bedding area, and a custom house (not pictured). He was also given Muff’s hammock, since Muff used it more as a platform than a relaxation tool. Muff [located in multilevel wire cage] had that hammock replaced with sturdy pine shelving in large and small sizes to keep him entertained. Since I know Muff loves wall climbing and tight spaces, he received a long pine wall to scale and squeeze himself up and down (don’t worry, it’s not too tight). Lulu and Fifi [located in the bottom right tripartition] received a spacious 3-way aluminum tube so they could snuggle together and new platforms to stretch their legs on. Finally, Koko [located in the top tripartition] received Mitty’s old hut and the girls’ smaller tube. She also got a few small ledges to prance around on – she’s not a jumper, so height has never been her preference.

We had a great time modifying our kids’ cages this time around, and it’s always an exhausting pleasure being put to work by the chinchillas! I know they’ll be happy for a few weeks to come. Remember, a chinchilla owner’s job is never truly done – it’s onward, and upward, always!

Stay tuned for our weekly Wednesday blog posts by following via email. Also, subscribe to us on YouTube and visit us on Facebook! We leave you with a sweet video and we hope you all have a great holiday, and spread that furry chinchilla love to your friends and family. Cheers!


LY Chinchillas Treat Donation

Donate healthy, delicious treats to LY Chinchillas to help keep our content going!

$5.00