treats

How To: Create Chinchilla Videos

While photographing chinchillas can be challenging, its rewards are adorable and its cuteness nearly unmatched. However, aside from taking your chinchilla photography to the next level through creating adorable sets, there is another medium which is much more true-to-life and far more engaging: videography.

Chinchilla videos allow for additional dimensions of sharing: movement, sounds, and quirky personalities shine! But creating and editing videos is a time-consuming process that may seem daunting for new videographers. No fret – I’ll help you break down the requisites to create compelling pet videos without getting overwhelmed.CaptureThere are a few steps to consider when it comes to the video-creation process: conceptualization, setup, videoing, post-production, and sharing. Read on, and you’ll be creating delightful videos in no time!

Step One: Conceptualization

Each great video starts with an epic theme: cuteness. But the question is, what kind of cuteness do you want to capture? Sometimes it’s fun to play into a certain theme or creative concept, such as “Paranormal Chintivity” or “CHINN Breaking News: Ebola Cure Found,”  there’s always room in the webiverse for no-frills, simple shots of your adorable fluffballs. While creating sets and developing themes is always fun, don’t forget to manage expectations. Every single set I’ve created for the fluffs has been thoroughly destroyed by the end of filming – and certainly, with all the destruction and re-takes, these videos require more post-production than a simple scene. If you’re just starting out, simplicity is key. A well-lit room (I prefer natural light always, but artificial light is also helpful when needed) and a chin-comfortable environment are the two must-haves for your chin’s YouTube success.ly edit_DSCF0060Another important question to ask is: how well do you know your chinchillas? Of course there will always be natural variables to every chinchilla’s behavior, but you should be in a comfortable enough place in bonding and learning your chin’s general demeanor. For example, I’d say “Muff’s not going to do well in a large, unconfined area. He’s a speed demon on the open road!” or “Koko Bear loves cuddling and massages. She’ll be a perfect cuddle or scratchies video subject!” or “Lulu and Fifi are wildcards! It’s pretty safe to say they’ll be little troublemakers on a hand-crafted set,” or “Mitty is an intelligent divo. He’s going to either give us incredible angles or ignore the camera entirely… likely a mix of both.” These kinds of insights into your fluffy ones will be the foundation upon which your video relies. Pick a personality and a setting to fit.ly edit_DSCF0063
Step Two: Setup

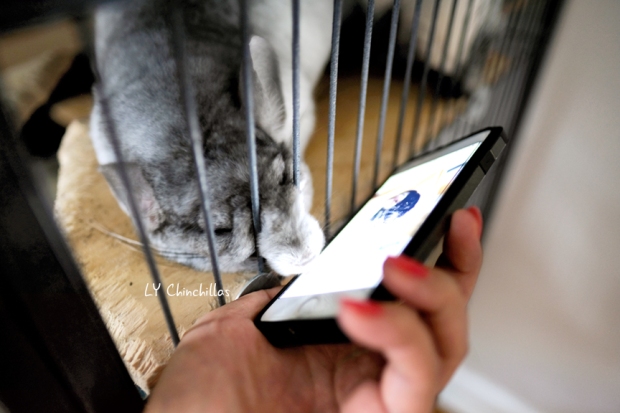
If you’re just starting out, it’s a great idea to start out in-cage to prevent your chinchilla from behaving sporadically due to being filmed in a new environment. Try to pick a time of day where your chin will be between sleepy and feisty – normally, midday works pretty well, between naps. This will also allow for the most amount of natural night for filming.ly edit_DSCF3742After a while, if you’ve become comfortable with in-cage videoing, you can start to get a bit more creative by moving your set to another area of the house. Great places are confined playroom areas such as closets, bathrooms, and other properly chinchilla-proofed spaces.
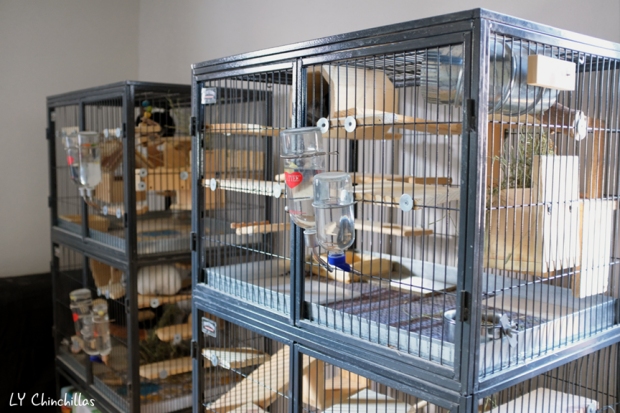
In order to put as much of the focus as possible on your little best friend, it’s important to make sure each area is as clean as possible. If in-cage, take the time to clean. If out-of-cage, same thing (+ chin-proofing). It may seem redundant and unnecessary, but the filming process and final output will thank you!ly fb edit_DSCF4065

Step Three: Videoing

There are plenty of options when it comes to the best gear to choose. Of course, still photography is one thing. Videography may seem similar, but there are a few more factors to consider with regards to this medium: ease of use and desired output.

While the bulk of our current YouTube videos are created with the latest iPhones, I have been taking more time and energy to create more beautiful and artistic videos with the 4K options that FUJIFILM X Series cameras have to offer. My go-to camera choices for video capture is the FUJIFILM X-T2 or X-T20, both boasting beautiful 4K with film simulation overlay options. I love the X-T20’s touchscreen LCD focus, which makes capturing moving fluffballs as much of a breeze as possible. Both options are mirrorless, meaning they’re lighter and easier to use than DSLRs.ly edit_DSCF0039A few of my favorite lenses for creating lovely video shots are the XF50mmF2 and XF16mmF1.4 for cinematic vibes. If you need an extra hand, try using a tripod to help steady your takes. I also love the XF10-24mmF4 and XF50-140mmF2.8 for the epic OIS (optical image stabilization), which minimizes shakiness (typical to iPhone output), and diversity of focal lengths in the zooms. If you’re working alone, OIS will come in handy when you’re shooting handheld. ly edit_DSCF0044So, which option is best for you: a smartphone, or a professional camera? It comes down to what you’re comfortable with and what kind of feel you want to convey in your videos. Oftentimes, a phone is all that’s available when something supercute happens out of the blue – making it perfect for those quick snaps and adorable memories. However, if you’re putting the time into a concept and setup, you should consider a more professional system for more epic chinchilla videos.ly edit_DSCF0056Gear aside, don’t get discouraged when you’re shooting – remember, there’s an inherent learning curve in all new and worthwhile endeavors. Try to time your filming on a treat day – don’t overindulge your chins, but if they’re on schedule for a treat, this is a great overlap. If you don’t get the shot, take a break and try again. If today’s not your day, maybe tomorrow is. Oftentimes, a patient and relaxed approach will yield the best possible results.

Step Four: Post-Production

The easiest way to share is to simply upload your captured video to your favorite social website, no frills and no post-production. This also means no post-production: no color correction, frame adjustments, splicing/cropping, or intro/outros – but it sure does get your chinchilla’s cuteness out there as fast as possible!

While that’s an expeditious method, I’m going to dive a little deeper into your alternatives if you’re looking to invest a little more time and energy into your post.

Apple’s iMovie is one of my favorites: it’s incredibly easy to use, and the learning curve is very mild if you’re a regular smartphone user. This is how the bulk of our videos were created, and the software is certainly good enough for most videographers operating in the pet-video-creation realm.ly edit_DSCF0045Final Cut Pro or Adobe Premiere Pro are great options for the more technically-savvy out there. These two are definitely professional grade software; a bit more difficult to learn than a simple interface like iMovie. However, it’s worth putting in the time, pulling up a few YouTube tutorials, and getting deeper into the edit! There are a lot more options in these types of technologies than a simpler interface can offer. To get started, a simple YouTube How-To search will get you where you need to go!19686725_10154490867201415_960349302_o.pngThere are also a plethora of other post-production options out there, but those are the ones we’re comfortable with! If you have any other favorites, feel free to comment and share with us.

Step Five: Sharing!

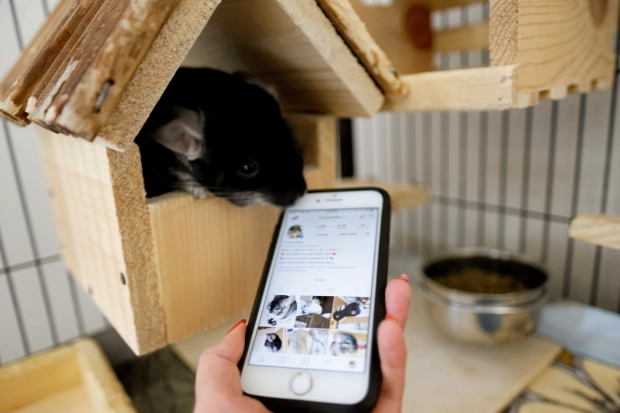
YouTube, Instagram, and Facebook are our all-time favorite sharing platforms. But, it’s really up to who you want to see your videos and how you want to share your chinchillas with the world. They’re definitely cute enough that they deserve to be shared, and you know it! Be sure to have fun and create a sense of community while you’re at it.edit_DSCF0069.jpg
Step Six: Bask in the Cuteness!

There you have it: the five simple steps to creating adorable chinchilla videos. Take this summer as a time to keep your chinchillas cool and creating even cooler videos! Don’t forget to check out our official YouTube channel here! There are a ton new videos on their way, just hit subscribe and enjoy the pawdorable fluffs. 🙂

LY Chinchillas Treat Donation

Donate healthy, delicious treats to LY Chinchillas to help keep our content going!

$5.00

How To: Chinchilla Holiday Photography

One of our favorite ways to get festive during the holiday season is with winter-themed chinchilla photo shoots! This guide will go through my process with photographing LY Chinchillas on my own with no strobes or flash (basically, nothing fancy)! Be sure to have a fast camera (I use the Fujifilm X-T10 Camera because of the super-fast continuous shooting mode) and light sources ready to go!Koko Warm Posing XmasThe very first thing to check prior to starting the shoot is the chin-proof factor. Admittedly, the actual time on set is very short – and the rest of the time is spent coaxing your little one back on set or sending them back to their cage to nap off a hard 10 seconds of work! In those off-set moments, you’ll need to make sure that everything is completely chin-proofed to prevent any accidents, fur loss, or injury.Muff Sideways HolidaysThe next thing you’ll want to check are your ambient light sources – that means your natural light, ceiling lights, desk lights, lamps, floor lamps, whatever other illuminating tools you may have in the shooting area. This will help capture your chinchilla by allowing you to have a faster shutter speed due to more available light. Normally, I prefer a clean white light, but for the holidays, there’s nothing wrong with a warmer glow that comes standard in most home lighting.
Grab a portable spotlight if your natural lighting is low – ideally, this will be somehow diffused. You can do this by using a strong flashlight or adjustable desk lamp covered and tied down with a very sheer scarf. This will make sure that your light is not too harsh and capture your chinchillas in all their softness.Set design holidays 2016 The third step is to create your set: start out with a fun, safe idea and execute! Fleece is always great, but other textures can be visually pleasing too. For my holiday shoot this year, I went with simple silver and white tree decorations, along with a chunky knit sweater. It’s important to note that these decorations are obviously not safe for consumption, so I would not suggest this for anyone who is starting out with shoots; managing the talent on set is a huge part of the multitasking these types of productions require!Lulu Munching Warm HolidaysThe final step is to shoot away! I like to set up the scene, get the lights on, take a few test shots, and then plop them in one by one to see how they react. Normally, my chins are very confused at the new environment, so they’ll take 10 seconds to look around before dashing off. Those 10 seconds are crucial! With a fast continuous shooting mode, you can grab up to 8 images per second – more than enough to finalize at least one adorable final shot.Mitty HolidaysKnowing your chinchillas, staying very patient, and setting realistic expectations is key: after shooting for years with them, I know that Fifi will be tough to contain (she has a strong dislike for unfamiliar environments) – so during this year’s shoot, she slipped out of the roster by her own sheer determination. Remember, it’s your own selfish cute-loving self who happens to be encouraging them to pose for adorable photos, so never get frustrated if things aren’t working out. If someone is being a diva, simply save the shoot for another day. Or, if you know a shoot is coming up, hold off on safe chews and treats for the week prior and let them munch on set. If difficulties arise, the rule is: better safe than sorry, always! It’s not worth straining your relationship with your beloved chin over some images.Muff Holiday Warm EatingDon’t be apprehensive to reinvent the concept if needed. Sometimes, simple is better. A fleece backdrop and a chew stick can yield incredibly cute shots, too! Staying basic is an awesome way to start learning how your chins will behave in front of the lights and camera. It’s always truly just a buildup of trust, anyhow. We all wish you a very warm and happy holidays with tons of bonding and photography, sweet friends! Koko Cute Head Warm Holidays

LY Chinchillas Treat Donation

Donate healthy, delicious treats to LY Chinchillas to help keep our content going!

$5.00

How To: Prepare Chinchilla Wood!

During apple-picking season, you may be compelled to think about your fluffs while you’re out with friends and family, gathering delicious ripe fruits by the handful. I certainly always think about my chinchillas, especially when I’m out and about in nature! As my fluffs are indoor pets, I always dream up ways to bring a taste of the outdoors to them. On occasion, one way I do that is by preparing delicious chin-safe woods with organic, pesticide-free wood. Multitasking in the orchard is always a challenge, but the chins will thank you! 🙂

Apple Orchard

Because apple wood is an absolute favorite for all my chin-babies, I love to source what I can during the season from healthy apple trees at local, untreated orchards in upstate NY or eastern CT. I’ll always ask the orchard manager if it’s okay for me to snip some branches from the trees as I’m picking my fair share of apples, and 9 times out of 10, they’ll comply with a smile. I aim mostly for twigs and sticks – the thinner, the better, as those are plentiful and easy to collect (and the chins love destroying twiggies!). Plus, smaller sticks and twigs are easier to manage when you’re preparing the wood for chewy consumption. Be sure to snip live branches, as those are the safest for your chins to chew once properly prepared.

Koko Fall

When you’ve gathered your arsenal of future treats, the first step is to break or cut them to size – delectable treat size, that is! I usually aim for 4-5″ in length, because they fit so perfectly in those adorable chinchilla paws. 😛 Place the pre-sized goods into a container of hot water, and use a clean toothbrush or scrubber to remove tannin and lichen from the sticks. You may have to rinse and repeat several times until the water runs clear over the sticks. Alternatively, you can opt to boil your pre-cut wood for 15-20 minutes, rinse, and scrub. Boiling the wood will help sanitize them better than hot water alone. It’s also fine to use a combination of these methods, as long as you fully implement one or the other.

Muff Cholla

After a final rinse, air dry the sticks over a towel. Once the sticks are completely dry to the touch, evenly space the sticks over aluminum foil or a tin pan, and place your chin-treats in the oven. Baking the wood is a matter of personal preference: some like to bake at an extended period of time on the lowest possible temperature, while others are more aggressive with the baking process. The most common range of temperatures fluctuate from 170 degrees to 300 degrees Fahrenheit.

Lulu cute

While chinchilla owners have their own preferences, I suggest trying out a few different temperatures to determine your favorite. Keep in mind that time and temperature can – and should – vary, depending on the thickness of your wood and overall quantity. I generally like to veer in the middle, around 230 degrees for as long as possible. I constantly keep the oven light on and check for any smoking bark. I’ll rotate the sticks or coins every half hour or so. Eventually, you’ll be able to see or test whether or not the wood is done – coins may be cracked, wood will be dry to the touch, and twigs will snap crisply and easily.

Apple Stick

Finally, turn off your oven and remove your sticks to cool. Once cooled, store your wood in a cardboard box and keep your goodies handy in a cool, dry place close to your chinnies. Or, you could work on some more DIY projects, such as creating hanging toys from your delicious woods! They’ll thank you for all your hard work – or at the very least, they’ll delight you with their happiness as they’re munching away! 🙂

Mitty Hanging toy

LY Chinchillas Treat Donation

Donate healthy, delicious treats to LY Chinchillas to help keep our content going!

$5.00

Chinchillas and Babysitters

As a chinchilla owner, sometimes the world beckons you away from the life of a stay-at-home chin-slave guardian. When the sweet oceanside breeze or faded sirens of some delightful foreign city tug at your heartstrings, you begin to remember what life was like before owning a chinchilla.

mitty love pillow chinchilla

All the feeding, cleaning, dusting, weighing, and constant bonding efforts can get overwhelming at times – not to mention the cage building, cage purchasing, DIY cage accents and hanging toys, cookie making, perpetual safeguarding against plastic, hefty air conditioning/dehumidifier bills, and constant provision of chin-safe chews, occasional chin-proofed playtimes, and continual supply of soft entertainment. And if you think that’s a handful, it’s just the start! For very loving chin-owners, chinchilla ownership is a way of life and chinchilla care and parenthood is just as much a part of your daily routine as work, friends, or school! They’re family! Honestly, caring for a chinchilla properly is time, energy, and money-consuming, but that smug smile on their fat, furry faces is worth every ounce of trouble! For new or potential owners, just go ahead and skip to our post all about chinchilla care basics to gather a light gist of what your fluffy workflow will be like.

Ko Tutu

So, back to that wanderlust dreamscape: island sunrise, countryside mountaintop, or city retreat. Maybe you’re thinking of leaving for a weekend, or flying off for a few weeks – after all, you’re a hardworking chin-parent, you deserve it! What’s the best course of action when you can’t take your babies with you? Let’s chat about chin-sitters! Inevitably, at some point in your chin’s very long and happy life with you, you will likely have to leave your beloveds in the care of a third party. This post is all about how to select and direct the perfect chinchilla sitter, and make sure your fluffs are well-cared for in your bittersweet absence.

lulu chinchilla hat

Step 1: Find your potential sitter. I’m lucky: I have an incredible family that lives close and are well-versed with my chinchilla obsession – they’ve endured endless lectures from me on chinchilla health and safety. Ideally, a family member or very close friend would be the best choice – someone who lives nearby, so you always have a reachable emergency contact. It’s best to find a sitter well in advance, as it’s all about availability and suitability.

Koko and Ellen

Step 2: Provide all necessary information to your sitter. I make a very thorough document touching on all major points, as well as directing them to this blog to find additional information. Of course, they can contact me at anytime through any social media platform, phone, or email in order to obtain additional information. Adding in the number of your exotic vet is always a great move, too. I always try to drive home the idea that this incredibly important document will be their chinchilla bible for the duration of their stay. Instructions should typically be much more conservative than the way you care for your chins, taking into account the differentiation in familiarity and knowledge of your particular chinnies.

Chin Care

Step 3: Test your potential sitter. After allowing sitters to review information, I’ll invite them over each day for several days in order to test their ability to handle, feed, dust, and care for the chins. I typically skip imposing the daily weighing routine while I’m away, as it is more involved than the other care elements and requires a deeper understanding of each chinchilla in order to successfully weigh them. I’ll always ask a few questions as I watch them work, including a few “what if” situations for good measure.

I was asked recently about why my playtime rules are so conservative. To elaborate, I’m all about playing it safe with my babies – especially given new circumstances, people, or events. Too many things can go wrong if your sitter isn’t completely trained for playtime, so I err on the side of caution. Every chinchilla is unique, and some are crazier than others (cough, Muff!); each new variable equates to a slew of new, potentially harmful results. Playtime is, in general, optional based on the opinion of each chinchilla owner. Additionally, playtime is not crucial in any means to a chin’s general health, so skipping a few sessions couldn’t possibly hurt them. On the other hand, overheating, fur slip, stress, or injury could. The most nightmarish situation I could think up would be a chinchilla injury occurring while I’m not home with no concrete proof of how, why, or when. I’d personally wait until I was home to conduct any playtimes, but everyone is different! Who knows, you could know a true chinchilla guru – but that would still be a risk you’d have to be willing to take as a responsible pet owner.

Muff Windowsill

Step 4: Buy a webcam! This is a great piece of technology that every chinchilla owner should buy, as it captures what your chin-sitter may neglect. I position the cam between the cages and angle the cages so I can see everything: water bottles, hay feeders, pellet bowls, and so on. Additionally, I’ll always position my thermometer close enough to the webcam in order to monitor their environment from afar. I have a webcam that’s easy to check via phone and even allows me to coo or sing to them from another zip code!

Fifi Super Cute

Step 5: Check in with your sitter every day. Text, call, or email! A short catch-up on your chin’s day is always in order. Of course, you can also inquire about how your sitter is doing! 😛

Step 6: Pay your sitter (with friendship, or money). Payment for quality service is always a gesture of goodwill. 🙂 Unless we’re talking family – in that case, put it on the communal tab.

muff light chinchilla cutie

Step 7: Keep in contact and repeat as needed! As the sourcing part of this process can be quite intense, it’s best to maintain great relations with your chin-sitter and keep in touch, as you never know when your travel bug will catch up with you again.

lulu chinchilla city

There you have it; the 7 steps to take when selecting and utilizing a chinchilla babysitter. Of course, use your sitters as sparingly as possible: chin-sitting is time and energy consuming, and only you know your chins best! 🙂 As with all exotic pets with specific needs, chinchillas require very willing and knowledgeable sitters, but most pet lovers can be trained with adequate time and accurate information over time. Happy travels, chin-lovers – and make sure your lovely fluffs are safe at home for when you return!

LY Chinchillas Treat Donation

Donate healthy, delicious treats to LY Chinchillas to help keep our content going!

$5.00

How To: DIY Chinchilla Hanging Toys

Hanging toys: the cutest, most heartfelt way to watch a chinchilla struggle without a twinge of guilt! They’re also dental-friendly treats that keep your fluffs engaged and entertained during long work or school days. I love chinchilla-safe woods and chews because they are a fabulous non-food way to make your chins happy and show them that you care – not that they need even more from you to be spoiled with! But really, just one more chew toy couldn’t hurt.. (and seriously, it couldn’t!) 😛 So, today’s post is all about how to make DIY hanging toys!

Lulu Fifi Lady Hanging Toy

There are only a handful of tools that are needed to make a very simple hanging toy:

  • Chinchilla-Safe Woods and Chews, 6″ or Smaller
  • Drill with Thin Drill Bit
  • Solid Craft Wire or Pliable Metal Wire
  • Hook to Adhere Toy to Cage Bars
  • Pliers to Cinch Wire Ends
  • Wire Cutter or Strong Scissors to Cut Wire

Craft Wire Drill Wood

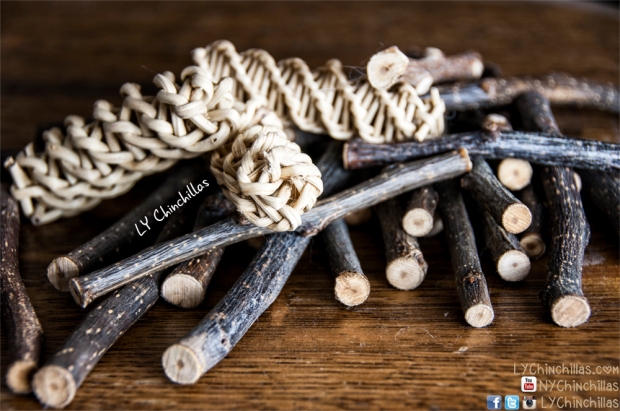
The first step is to gather your goods! We use apple sticks, pear sticks, chunks of pine, and vine twirls – but some all-time favorites include natural loofah, blocks of pumice stone, shredder tape, and more! Feel free to read about chinchilla safe woods and chews to get some ideas for your own custom toys. Over time, you’ll come to realize which woods or chews your chins prefer. Another great tactic is to use the barkless wood that your chins have already partially demolished; it’s a thrifty way to re-purpose the seemingly unwanted sticks (they’ll be slower to go at them, but they’ll begrudgingly get to it eventually). Then, I drill through the center of the wood, but wood vendors tend to sell pre-drilled wood for easy toy-making.

wood and fine toys

The next step is to cut your wire to the desired hanging length, adding on a little extra just in case. I typically cut the wire to 12″ and remove any extra length prior to finalizing the toy. It’s important for your wire to be made out of a solid metal to dissuade exploratory chewers (although they’re typically too preoccupied with the hanging toy to consider munching on the wire). Another great way to put your mind at ease is to either fill the wood to the very top so that there is no exposed metal, or to hang the toy strategically so that the exposed area is not reachable. I have seen other varieties in toy-making such as seagrass or chains, but it ultimately depends on what you know to be the safest, best option for your particular chins. So far, there have been zero issues with our construction and the final products are spot-on for my five furry babies.

Muff going for his chew toy

For the top of the toy, I’ll wrap the wire tightly around the hook, using pliers to tuck the edge away. Since we go through faulty glass water bottles every few months, I make sure to keep the hardware for hanging toys – the hooks are perfect for the cage bars, because they’re made for just that! Another good alternative would be shower hooks, as they’re self explanatory and easy to work with.

Water Bottle Hook and Pliers

The funnest part for me is next: to string all the toys on the wire in my favorite order! I like to mix up the different woods and chews to offer some variety for the chins – plus, they look really nice when they have some diversity to them.

Mittenmaus Hanging Toy

The trickiest and final part is to close off the hanging toy. If you’re using a thicker wire, you can simply use pliers to close off the toy in a “U” with the wire and call it a day. Using a thinner wire is easier to work with initially, but is a tad tougher to close off. The way I do it is to string the wire through the last stick – enough slack for the wire to wrap around the stick twice – and thread the wire through the hole a second time, pulling the wire flush to the stick. Because this type of craft wire is so malleable, it will secure itself easily after being pulled and be unable to be readjusted without pliers. The last step is to cut the excess wire flush with wire cutters or strong scissors (although after a certain amount of practice, you’ll be able to calculate the perfect amount of slack not to need to cut the wire at all).

Drilled wood and secured wireSecured wire in drilled wood

And voilà! There we have it – hang away and watch your happy chinchillas struggle with sheer delight! 🙂 The more toys you make, the more endless variety you’ll find that there is! You can make toys in all different sizes and shapes – the fun is being able to take some time out of your day and do something that takes your mind off of how much money, time, and energy you spend on your chinchillas by creating something lovingly by hand for their spoiled enjoyment!

Koko Hanging Toy

LY Chinchillas Treat Donation

Donate healthy, delicious treats to LY Chinchillas to help keep our content going!

$5.00

Chinchilla Cookie Recipe

To celebrate the inevitable approach of spring – finally! – I’ve decided to share my chinchilla cookie recipe with everyone, so that our fur babies can have a delicious treat to celebrate with us! My mentality about these baked treats is more “baked” than “treat” – offering your chinchillas their daily diet in a different form or composition is a great way to encourage healthy eating habits and boost consumption! Diversifying is always a fun way to prevent boredom, too. These cookies are simple to make, and fun to consume.

Chinchilla Cookies

Cookie Flower

Makes 20-25 Small Cookies

Prep Time: 20 minutes / Bake Time: 2 hours

Mitty Eating Cookie

DOUGH: For the base of my cookie dough, I use a mix of pellets and hays. Since my chins’ diet consists of Manna Pro and Mazuri, I like to use 1 cup Mazuri and 1/2 cup Manna Pro. You can use the chin feed your chinchillas prefer! Mix the pellets with a variety of hays: a combination of Timothy and Alfalfa hay “dust” – you know, the leafy, dusty, tiny particles left over from hay bags. Sift through the hay dust to remove larger stems, as they won’t hold well in the dough. Place the 1.5 cup of pellets and 1.5 cup of hay dust in a food processor or blender, and blend until everything becomes a fine powder.

Cookie Dough

ADDITIONS: Place the mixture into a stirring bowl and add in one tablespoon of cold-milled ground flax seed and 1/8 cup of organic rolled oats. Separately, I prepare my water mixture, with 9 parts water to 1 part unsweetened apple juice (I use a juice press to press the juice from fresh fiji apples, for taste).

Cookie Flax

MIXING: I make sure all the dry elements are well-mixed, and begin adding in my water/apple juice mixture little by little, kneading the dough as I go. Hays and pellets have an absorptive reaction, so kneading by hand is the best way to tell how saturated the dough is.

Koko Cookie 2

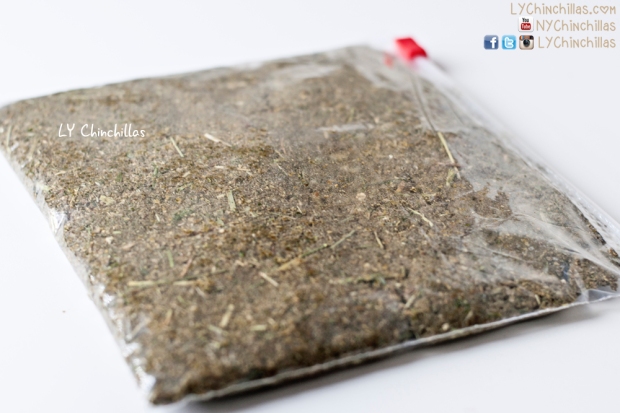
REFRIGERATE: When the dough is at a cookie dough consistency, I place the mixture into a plastic bag. Then, I flatten the dough in the bag and refrigerate for several hours in order for the dough to set and become more easily mold-able (this refrigeration step is optional, but recommended).

Cookie Bag

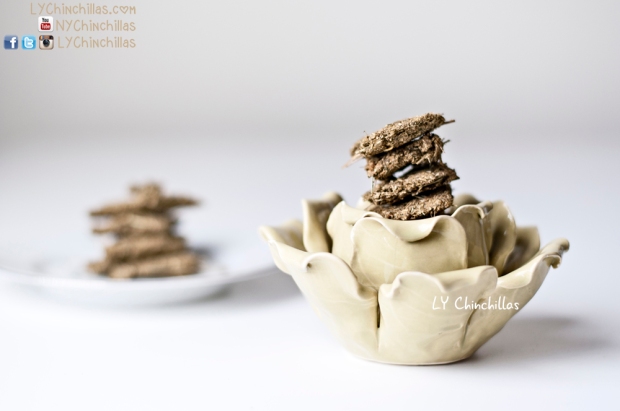
MOLDING: When I’m ready, I’ll make small balls of dough, press them flat, and use a rolling pin to flatten the cookies evenly. I personally don’t use cookie cutters, because I prefer the natural shape each cookie has – but I’m sure they would be adorable if you chose to use shapes. Keep in mind that due to the consistency of the dough, it’ll probably take some time to form your cookies into dense enough shapes to bake successfully.

Muff Cookie

BAKING: Finally, I’ll bake the cookies at 200 degrees for approximately 2 hours – don’t forget to check the oven from time to time to gauge the cookie’s status. The low heat prevents burning, while allowing the cookie to fully bake through. Mold during storage can be a problem for home-cooked chinchilla goods if the water content has not been adequately baked out, so it’s important to make sure the final cookies are dry and brittle. Also, chins love the crunch!

Lulu Cookie 2

STORAGE: Remove the cookies from the oven and allow them to dry overnight at room temperature. Keep cookies stored in an airtight food container in the freezer and serve as needed for a delicious treat! Since most of the moisture content has been baked out of the treats, freezer storage does very little to alter them.

Koko Cookie

There you go! Healthy cookies for your fluffballs. There are plenty of other versions out there that include pumpkin puree or molasses, but we opt for a more basic cookie treat that isn’t too much of a guilty pleasure! My chins enjoy 2-3 cookies per week as a supplement to their existing diet – although adding in these cookies means decreasing all other treat consumption. Cheers! 🙂

Cookie Flowers

LY Chinchillas Treat Donation

Donate healthy, delicious treats to LY Chinchillas to help keep our content going!

$5.00

Chinchilla Holiday Cheer!

As the chestnut praline lattes spiral gloved hands and Christmas tree shops begin to adorn every corner, it’s inevitable to fight it – Holiday Cheer is headed our way! As soon as the Thanksgiving bird is carved, Christmas sparkle starts to infiltrate our spiced cinnamon veins, trickling slowly to our pulsing glitterati hearts. We love this season!

LY Chinchillas Holiday S

The city has been absolutely glimmering. With the bittersweet entrance of winter, we start bundling up in hats and scarves – and we can’t help reminiscing about yesteryear and futurescape. The falling leaves, the harsh wind’s kiss, the soft flutter of snowflakes. It’s important to remember: yes, while this time of year is tough and frigid, it’s romantic as well. This time is as important as any other in our lives. After all, we’re together for now, aren’t we?

City Holidays LYCs

While we’ve had a barrage of family visiting from nearby states and overseas alike, we’ve found a way to incorporate chin-love into the center of the holidays. Sure, we traipse the incredibly shimmery streets of New York City during the day while the chins are snoozing, but upon our return, we shower them with holiday cheer and endless love! That’s what the holidays are all about – forcible cuddling (just kidding!), delicious treats (sparingly!), and family.

And yes, of course – I conducted a full-on holiday photo shoot. No shame, only props and sweet misbehaving chinchillas! Photos will be released on our Facebook Page throughout this lovely month! I’m also thinking of doing another shoot with snowflakes and drums (think snowy little drummer boy scene) – but we’ll have to wait til the excitement of this week’s shoot has calmed a bit. Luckily, this shoot required no treats and that is a great thing – it means more shoots and more obedient, healthy chins.

That doesn’t mean, however, that the lucky babies don’t get any treaties! We all need a special little something from time to time in order to ensure our ongoing sanity. That, my friends, is how I spent my Black Friday weekend – buying family gifts and getting myself a little something as well. 🙂


Anyhow, as things are regulating lately, I’ll be posting every Wednesday here on the blog! There will be daily postings on Instagram, Twitter, Facebook, weekly on YouTube (be sure to subscribe!). The whole family wishes you a great start to your December!

LY Chinchillas Treat Donation

Donate healthy, delicious treats to LY Chinchillas to help keep our content going!

$5.00

The ‘LY Chinchillas’ Diet

Today, I’m going to share my chinchilla diet with all of you! Now, I’m sure that there are many amazing owners out there that choose differing approaches, and that’s not to say that any method is better or worse than others (although there ARE chinchilla basics to abide by). Every pet owner, like every parent, has their own opinion regarding best practices for raising their chin-children. That’s simply how it is. Different countries adapt different standards based on experience and availability. For example, French, Russian, British, and other global owners will all have slightly differing opinions on chinchilla care. I suspect their level of love for the furries are equal, no matter their distance from one another.

Muff Blue

To start, pellets! As the foundation of my chins’ diet, I use Manna Pro SHO. Although Manna Pro SHO is a show quality rabbit food, it’s known to breeders and owners alike to be chinchilla-safe. Most rabbit foods are NOT chinchilla-safe, and I would advise against using most any foods intended for other small animals. About a year ago, I began mixing the feeds because after a brief trial run, it became evident that my chins were eating more with a combination of the pellets than with either alone. Although I started with a mix of Manna Pro and Mazuri, I found my chins to respond much better to Manna Pro SHO alone and decided to absolve Mazuri of its duties (over the course of several weeks, of course). Again, it’s all about preference and quality.

Another basic element of my chinchilla diet is hay. I use 2/3 mix Timothy hay and 1/3 mix Orchard hay or another variety of grassy hay. I feed alfalfa hay twice a week at the same amount as the Orchard mix. I feed more to Koko, my youngest. Alfalfa is great for growing chinchillas and higher in protein and calories, so it makes for a delicious snack. I know some owners have picky chins, but hay is an essential part of healthy eating for chinchillas and should always be readily available for them – I’d suggest trying out different brands to find your chin’s favorite. I personally prefer Kaytee brand for most of my hays, as they are easy to find in my area and cut at a nice length, enough to serve without huge pieces or too many loose pieces (which chins won’t eat). Oxbow is a close second, if Kaytee’s not in stock.

Now for the accoutrements! Aside from hay and pellets, I like to offer a variety of consumptive elements for my kids. Let me stress that hay and pellets should be 95% of their diet – the higher quality pellets and hay, the less your chin will require anything else. A semblance of choice is always great, but the basics should always remain fresh and available.

The safest and most necessary of these fun additions is wood and chews! Be sure to check out this list of safe woods and chews. The reason these elements aren’t part of the 95% of their diet is because chins chew these goodies more than they actually eat them. Chins love wood! Their teeth are constantly growing, and wood chews are necessary to keep them filed down. To start, I have custom-built a cage to include all kiln-dried pine ledges and houses, which ensures that without adding any chew toys, the kids are still adequately able to file their chompers. Then, I pick out or harvest additional wood for them to enjoy, such as apple, pear, or other safe woods. The little apple sticks are their favorite! Loofahs, pumice stones, and other safe chewy elements are also great for them to chew. My avid dusters Muff and Lulu will chew on the stones and then attempt to bathe! 😛

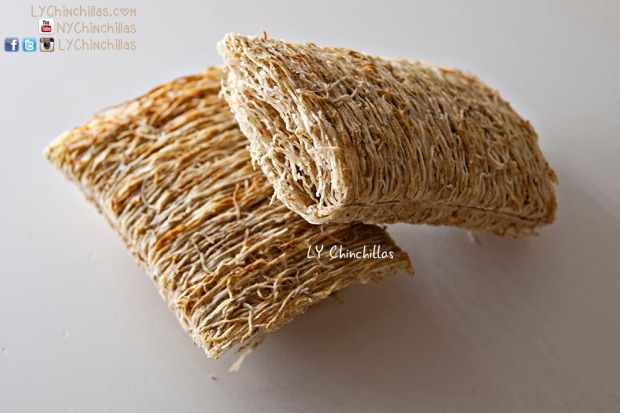
As for food treats, it’s important to moderate consumption, and be sure to avoid giving treats to chins younger than 6 months old. Their growing bodies need to develop before incorporating treats into their diet. However, when chinchillas ready for treats, a big go-to for me are shredded wheaties! The spoon-sized sugar-free version of the cereal is a delicious wheat-based treat for the kids. They love the big crunch and the perfect portion. I’ll give them half a piece of shredded wheaties once or twice a week. Sugar-free Cheerios are also fun, but they contain more additives than the shredded wheat, so I’ll toss them a piece every few weeks. These treats are in no way a replacement for actual pellets or hay!

Another nice treat for them are herbs and select flora, such as rose hips and marigolds. My chinchillas love these additions, but they are only offered once every few weeks. It’s important to research herbs prior to consumption, because most herbs contain medicinal properties.

I also created a little supplement for my chins, consisting of organic rolled oats, a pinch of wheat germ and cold-milled flax seed. While I respect that many owners feel that supplements are unnecessary, I’ve found that the mixture stimulates overall appetite, and is perfectly safe. I portion out about 1 teaspoons every 2 months.

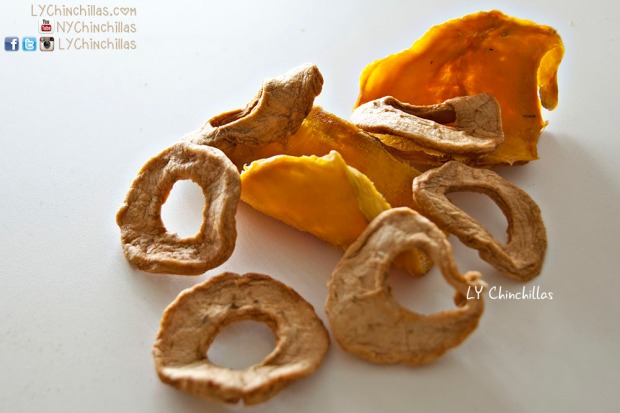
A more “dangerous” treat for chins (quotations because of highly varying opinions) I allow my chins are three types of dried fruits: dried apple, dried goji berries, and more rarely, dried mangoes. I’ll give them one (not all three) of these treats once every 3 months, and very small pieces. They are high in sugar, which can lead to bloating and tooth decay in chins down the road, potentially shortening overall lifespan. However, as with humans and all of the world’s animals, moderation is key. Dried apples, mangoes, and goji berries are, in my opinion, better than craisins and raisins for the simple fact that they have a lower sugar content dispersed in a larger piece of the fruit. Raisins and craisins have a lot more sugar packed into a tiny little area, making them more dangerous for chins in the long run.

Finally, the most controversial treats of all: nuts. I know owners love to crucify one another for feeding chinchillas nuts or seeds. I can see why – setting a precedent for other owners is a sticky thing – we all learn from one another, and gain knowledge from experience. That’s why I carefully approach this subject. Many are quick to say that chinchillas can’t digest fat. It is not true that chins can’t digest fat. They can; they simply cannot metabolize a lot of it (so to say, a diet high in fat and oils). A rare treat of an almond or sunflower seed benefits them with a safe dose of essential fatty acids. Being a responsible chin owner means knowing the difference between a rare treat and a safe treat is (yes, such as wood chews and select herbs and hays like alfalfa). I understand folks out there can see a video or a photo and think that owners like myself are perpetuating the idea that almonds and nuts are okay as frequent treats – but that’s not true, nor is it the intention. Nuts are not inherently deadly to a chinchilla, they are simply very unhealthy if intake is not strictly monitored. It’s ultimately a chinchilla owner’s responsibility to research safe, healthy treats to give to their pet. After speaking to breeders and owners alike who have cared for chinchillas that have lived up to 20 years, I’m not entirely convinced at the searing level of scrutiny placed on chinchillas consuming nuts – although yes, it does have some merit. I personally will allow my chins a sunflower seed or an almond sliver every 3 months. Please note these quantities are very, very low and I am insistent on low overall treat intake.

As a final note, I’ll add that I always stay far away from processed treats – even if they’re from big brand names – because there is not enough research to support how chinchillas react to chemicals and additives. However, if human response is any parallel, we can see how negative of a reaction chins might have! If a treat has too many elements or looks more like it should feed a human more than a chinchilla, I’d skip right over it and look for organic options, preferably something that has not been treated or processed at all. In fact, making your own pellet and hay based chinchilla cookie is downright delicious and safe! Read my recipe here.

And there you have it, folks! The LY Chinchillas diet! Feel free to comment or share, and definitely feel free to disagree with me. I have curated information from vets, breeders, owners, and my five chinchillas to come to my personal conclusions for what I believe are the healthiest and happiest ways to feed my chinchillas. I hope you do the same for yours!

LY Chinchillas Treat Donation

Donate healthy, delicious treats to LY Chinchillas to help keep our content going!

$5.00