This week’s post will be all about how to build your own custom chinchilla cage! Since last week’s post, I’ve had many inquiries asking how I built my own cage and the step-by-step process involved. So let’s get to it!
There are a few things to remember prior to making this decision:
- Building your own cage is NOT less expensive than buying a quality pre-made cage. In fact, it often runs more expensive in terms of items needed and time spent designing and creating the cage. Our cage cost roughly $600 to construct, and that’s an ongoing number as we continue to modify and improve it.
- Knowing your chinchillas well or caring to know about them well is critical to building a successful cage (although there will be many things you’ll learn about them as they discover new spaces). The whole purpose of custom building is to allow your chins exactly what they want and prefer out of a home, so it’s best to keep that in mind when making it the first time around.
- This process is extremely time and energy consuming, so it’s best to team up with someone that has some patience and strength! We built our cage in a single day, but we also were incredibly motivated at the time.

Step 1: Gather tools!
For the foundation:
- Wardrobe unit or sheets of kiln-dried pine, fitting for your space and preference
- Minimum unit size per chin should ideally be a 3 foot cube; when constructing your own cage it’s beneficial to offer them as much space as possible. Our single units are approximately 4 feet x 3 feet x 2 feet. We would love to give them each a much larger home, but we do live in NYC and have four full units for five chinchillas.
- Jigsaw, chop saw, or skill saw
- Hole saw, 4” diameter or larger
- Drill with self-tapping screws, from ½” to 2” long
- Drill bits of various sizes, from 1/8” to ½”
For the screen:
- Mesh wire, ¼” or ½”
- Wire cutters
- Carpet trim, metal or wood
For the inside:
- Kiln-dried pine for constructing ledges and platforms
- Tubes
- Hammocks
- Food Bowls and Hay Racks
- Dust houses
- Chinchilla-specific huts, toys, and wheels
- Granite or marble slabs
For the lighting (if you should choose to include):
- Light fixture
- Extension cords
- Staple gun with ½” long staples
Accessories:
- Lock
- Bungee Cords
- Thermometer
- Water bottles

Step 2: Construct & Deconstruct the Foundation
This would be a lovely time to create a design for your chinchillas. Depending on how many single units you want to fit in your chinchilla complex, you’re going to have to make some decisions. Who goes where, what they love, who wants to jump, who likes to be lazy, etc. If all your chinchillas are amicable, I’d suggest creating something that could potentially be sectioned off into different levels later on, should any disharmony come into the group.
It’s important to note that most wardrobes purchased at most stores are wood veneer covered chipboard. It’s not ideal – the most ideal wood to use would be kiln-dried untreated pine. However, in my experience, my chinchillas will chew platforms and ledges prior to their cage frames.
So, take a look at the wardrobe you’ve selected. It’s time to mentally construct and deconstruct this guy! You’ll need to keep the frame but remove as much of the walls as possible in order to ensure maximal wire mesh coverage. This is so that your chins have a breezy complex that allows the passage of air through their living space at all times. It’s important for chins to have fresh food, water, and circulating airflow. I try to keep it all very zen and health-conscious in that way. In order to accomplish this, there will need be a sturdy frame and pillar or sections to keep the cage sturdy.
You’ll need to decide the overall structure of the frame prior to assembling or disassembling. It’s best to start out with drawings or sketches, and change as needed if you hit certain roadblocks. Once you’ve made up your mind, you can cut out the front walls, construct the cage and begin to remove certain elements.

The first physical step will be to cut out the front of the cage. The front walls are typically doors, so you’ll need to use a saw and remove the meat of the doors, leaving a frame which will be fitted with wire mesh. The best way to secure mesh is to start tightly from one corner and work your way out, securing with screws as you go in both directions.
Then, you’ll need to construct the frame of the cage, leaving out the back panel. Typically, it will be the back walls that will go completely and the shelving that will stay in some way. You can remove the entire back before it has even been affixed and fit it with mesh instead.
The side walls and ceiling, after the frame is constructed, can contain many unique window cutouts that can be fitted with wire mesh or plexi from the outside. All wire mesh should be affixed from the outside, so that your chinchillas will not have access to biting the sharp edges (which can’t help but stay sharp unless you weld it in some way). Same with plexi, as eating plastic is never chin-healthy. Luckily, some of my chins have an aversion to eating plastics, so based on my personal experience with them, I allow some to have plexi platforms.
As your cage comes together, you’ll notice that the wire mesh is quite unsightly. To solve this, you can purchase lengths of carpet trim in either metal or wood, whatever fits with your theme best. This will serve to cover the edges of the wire mesh, also helping to secure them neatly.
So, at this point, your cage should be fully structurally sound and fully formed. It’s all about moving on to the inside of the cage and personalizing for your little babies.

Step 3: Interior Design
Platforms first! Getting the larger basics down will help section off your space and make for safe, fun levels. I suggest keeping platforms 6-8” apart height-wise just for safety. Any higher, and a fall could potentially hurt your chin. Also, platforms should be around 4-5” wide. Platforms can be secured from one side to the other, or just act as a large ledge protruding from the left, back, or right of the cage.
Don’t forget ledges! Fun rounded shapes for corners, sides, and all around. Sizes can vary, from 3″ upward. We started with cutting a plethora of ledges or preparing appropriate chin-safe wood branches and then went around, screwing them in with hardware from the outside.
Personally, I never worry about ledges or platforms getting dirty or worn down. Kiln-dried pine is relatively inexpensive and easy to replace when you have a custom-built cage, so the chins are encouraged to destroy and munch as much as their little hearts desire.

Great things to incorporate into your cage are bedding pans! I’d suggest powder-coated metal with a drawer mechanism, although for now we are using Vitakraft ECO bedding and creating little litter corners for the kids. It works for us for now; we have had a tough time finding custom pans for the kids, so we’ll wait until we’re ready to create custom metal pans.
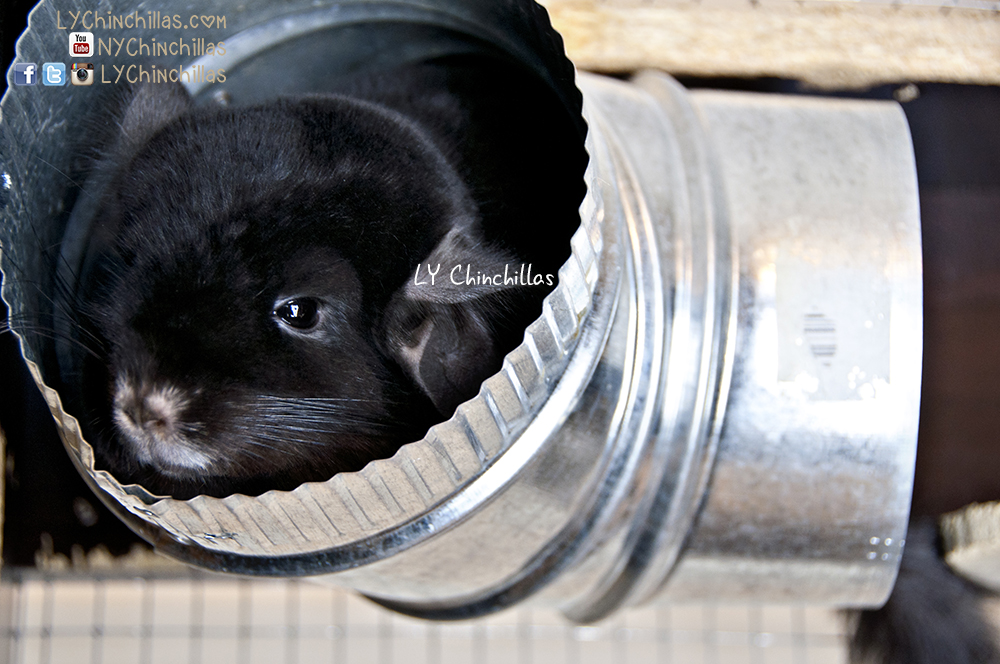
For our cage, we went with aluminum tubes – my chins don’t even show the slightest interest in chewing metals (although if yours do, this is not a safe option). They’re very sturdy and a year in, they look as new as the day we got them. There are many different sizes and shapes for chins who love to cuddle or just relax on their own. I know many people use fleece-covered PVC or cardboard tubes; that’s a great addition too.

Fun additions are little chin-holes for traveling between units! This works great for chins who want a little space from a friend, or some time to reflect on which unit is their favorite. We did this for our kids early on; when they became inharmonious together, we simply closed off the adjoining holes and brought back some peace to the family.
As far as food provisions go, we use PVC tube coverings (they look like little bowls) with a screw through the bottom, which then connects to a drilled hole at the bottom of their cage. The bowls are easy to remove and stand-alone, which is pretty cool. Everyone except Muff gets this PVC, because they know not to chew plastic. Muff, on the other paw, has a glass bowl for his food. We still use physical glass bowls for hay, because our chins don’t have any respect for hay racks.
We also screwed down a few slivers of pine to affix granite slabs in their place, so they can freely be placed on a platform without a worry of being shifted. We have never had a problem with our chins and screws, because we use a countersink method (which means the screw falls flush or deeper than the wood).

Hammocks, huts, wheels, and toys are final additions for the kids. Some use these items more than others; it’s a great chance to personalize each area for each chinchilla. I personally don’t let them have individual dust houses, but that’s only because their cage is in our living space (so it would be wildly messy – even more-so than the crazy cleaning schedule we have now) and I also enjoy handling and bonding with them each and every day when they receive their dust baths. It’s a nice daily ritual we have, and it works for us.
Step 4: Lighting and Accessories
We’ve tried a few different lighting techniques for the cage. It’s easy to lose the kids in a dark background (especially if your chin’s fur is dark as well), so lighting is a great option if done safely. We always use low power LED lights that don’t generate any actual level of noticeable heat, fixed to areas that the chins can’t reach – such as the cage ceiling or on the outside, near but not on a window. The lights we have now have a switch for easy on/off. We use extension cords to power the lights and used a staple gun to adhere the wires flush to the outside of the cage, creating a clean look. We always unplug the light if we aren’t using it, or are out of town for a day or two.

Finally, we have bungee cords at the top and bottom and a lock in the middle! The bungees are to keep the cage doors flush and quiet when they wall jump; the lock is to keep the entire cage secure. Also, there are two glass water bottles adhered to the outside of the back of each cage unit, just in case one water bottle goes wonky. We also placed a thermometer on the cage so we know exactly what the temperature of their environment is, and can adjust accordingly. We never let the room get higher than 75 degrees Fahrenheit.
Step Five: Kick Back and Enjoy!
So, there you have it! The long, arduous, and very rewarding process of building your own custom chinchilla cage! It’s incredibly easy to make changes to your cage once it’s up and running, and your chinchillas will never look back at their old cages. It’s not for everyone, and it’s certainly time, energy, and money consuming, but it’s a really great experience to feel as if you’ve given a part of your creativity and design to your babies. Admittedly, there are many different avenues to feel this way; this is only one!
Be sure to follow the blog by signing up via email, subscribe to us on YouTube, Facebook, Instagram, and Twitter! Requests for our Weekly Wednesday Blog Post topics can be submitted through any social media outlet, via lychinchillas@gmail.com, or directly through the blog!
We leave you with a sweet donation opportunity and wish you a wonderful holiday week!
LY Chinchillas Treat Donation
Donate healthy, delicious treats to LY Chinchillas to help keep our content going!
40.712784
-74.005941