Have you ever wondered how best to handle your chin? Well, wonder no more! Here’s a quick video to help guide you on your start to safely holding, transporting, and handling your chinchilla.

Have you ever wondered how best to handle your chin? Well, wonder no more! Here’s a quick video to help guide you on your start to safely holding, transporting, and handling your chinchilla.
While photographing chinchillas can be challenging, its rewards are adorable and its cuteness nearly unmatched. However, aside from taking your chinchilla photography to the next level through creating adorable sets, there is another medium which is much more true-to-life and far more engaging: videography.
Chinchilla videos allow for additional dimensions of sharing: movement, sounds, and quirky personalities shine! But creating and editing videos is a time-consuming process that may seem daunting for new videographers. No fret – I’ll help you break down the requisites to create compelling pet videos without getting overwhelmed.There are a few steps to consider when it comes to the video-creation process: conceptualization, setup, videoing, post-production, and sharing. Read on, and you’ll be creating delightful videos in no time!
Each great video starts with an epic theme: cuteness. But the question is, what kind of cuteness do you want to capture? Sometimes it’s fun to play into a certain theme or creative concept, such as “Paranormal Chintivity” or “CHINN Breaking News: Ebola Cure Found,” there’s always room in the webiverse for no-frills, simple shots of your adorable fluffballs. While creating sets and developing themes is always fun, don’t forget to manage expectations. Every single set I’ve created for the fluffs has been thoroughly destroyed by the end of filming – and certainly, with all the destruction and re-takes, these videos require more post-production than a simple scene. If you’re just starting out, simplicity is key. A well-lit room (I prefer natural light always, but artificial light is also helpful when needed) and a chin-comfortable environment are the two must-haves for your chin’s YouTube success.Another important question to ask is: how well do you know your chinchillas? Of course there will always be natural variables to every chinchilla’s behavior, but you should be in a comfortable enough place in bonding and learning your chin’s general demeanor. For example, I’d say “Muff’s not going to do well in a large, unconfined area. He’s a speed demon on the open road!” or “Koko Bear loves cuddling and massages. She’ll be a perfect cuddle or scratchies video subject!” or “Lulu and Fifi are wildcards! It’s pretty safe to say they’ll be little troublemakers on a hand-crafted set,” or “Mitty is an intelligent divo. He’s going to either give us incredible angles or ignore the camera entirely… likely a mix of both.” These kinds of insights into your fluffy ones will be the foundation upon which your video relies. Pick a personality and a setting to fit.
If you’re just starting out, it’s a great idea to start out in-cage to prevent your chinchilla from behaving sporadically due to being filmed in a new environment. Try to pick a time of day where your chin will be between sleepy and feisty – normally, midday works pretty well, between naps. This will also allow for the most amount of natural night for filming.After a while, if you’ve become comfortable with in-cage videoing, you can start to get a bit more creative by moving your set to another area of the house. Great places are confined playroom areas such as closets, bathrooms, and other properly chinchilla-proofed spaces.
In order to put as much of the focus as possible on your little best friend, it’s important to make sure each area is as clean as possible. If in-cage, take the time to clean. If out-of-cage, same thing (+ chin-proofing). It may seem redundant and unnecessary, but the filming process and final output will thank you!
There are plenty of options when it comes to the best gear to choose. Of course, still photography is one thing. Videography may seem similar, but there are a few more factors to consider with regards to this medium: ease of use and desired output.
While the bulk of our current YouTube videos are created with the latest iPhones, I have been taking more time and energy to create more beautiful and artistic videos with the 4K options that FUJIFILM X Series cameras have to offer. My go-to camera choices for video capture is the FUJIFILM X-T2 or X-T20, both boasting beautiful 4K with film simulation overlay options. I love the X-T20’s touchscreen LCD focus, which makes capturing moving fluffballs as much of a breeze as possible. Both options are mirrorless, meaning they’re lighter and easier to use than DSLRs.A few of my favorite lenses for creating lovely video shots are the XF50mmF2 and XF16mmF1.4 for cinematic vibes. If you need an extra hand, try using a tripod to help steady your takes. I also love the XF10-24mmF4 and XF50-140mmF2.8 for the epic OIS (optical image stabilization), which minimizes shakiness (typical to iPhone output), and diversity of focal lengths in the zooms. If you’re working alone, OIS will come in handy when you’re shooting handheld.
So, which option is best for you: a smartphone, or a professional camera? It comes down to what you’re comfortable with and what kind of feel you want to convey in your videos. Oftentimes, a phone is all that’s available when something supercute happens out of the blue – making it perfect for those quick snaps and adorable memories. However, if you’re putting the time into a concept and setup, you should consider a more professional system for more epic chinchilla videos.
Gear aside, don’t get discouraged when you’re shooting – remember, there’s an inherent learning curve in all new and worthwhile endeavors. Try to time your filming on a treat day – don’t overindulge your chins, but if they’re on schedule for a treat, this is a great overlap. If you don’t get the shot, take a break and try again. If today’s not your day, maybe tomorrow is. Oftentimes, a patient and relaxed approach will yield the best possible results.
The easiest way to share is to simply upload your captured video to your favorite social website, no frills and no post-production. This also means no post-production: no color correction, frame adjustments, splicing/cropping, or intro/outros – but it sure does get your chinchilla’s cuteness out there as fast as possible!
While that’s an expeditious method, I’m going to dive a little deeper into your alternatives if you’re looking to invest a little more time and energy into your post.
Apple’s iMovie is one of my favorites: it’s incredibly easy to use, and the learning curve is very mild if you’re a regular smartphone user. This is how the bulk of our videos were created, and the software is certainly good enough for most videographers operating in the pet-video-creation realm.Final Cut Pro or Adobe Premiere Pro are great options for the more technically-savvy out there. These two are definitely professional grade software; a bit more difficult to learn than a simple interface like iMovie. However, it’s worth putting in the time, pulling up a few YouTube tutorials, and getting deeper into the edit! There are a lot more options in these types of technologies than a simpler interface can offer. To get started, a simple YouTube How-To search will get you where you need to go!
There are also a plethora of other post-production options out there, but those are the ones we’re comfortable with! If you have any other favorites, feel free to comment and share with us.
YouTube, Instagram, and Facebook are our all-time favorite sharing platforms. But, it’s really up to who you want to see your videos and how you want to share your chinchillas with the world. They’re definitely cute enough that they deserve to be shared, and you know it! Be sure to have fun and create a sense of community while you’re at it.
There you have it: the five simple steps to creating adorable chinchilla videos. Take this summer as a time to keep your chinchillas cool and creating even cooler videos! Don’t forget to check out our official YouTube channel here! There are a ton new videos on their way, just hit subscribe and enjoy the pawdorable fluffs. 🙂
LY Chinchillas Treat Donation
Donate healthy, delicious treats to LY Chinchillas to help keep our content going!
$5.00
Over the year, we’ve had some great topics and fun things to write about! Located on our Favorite Topics page, we wanted to share with you our most poignant and important posts that have helped out our furry friends and their owners the most. The entries are linked so you can click through and read whichever article you find most helpful!
What’s a Chinchilla?
Chinchilla Health
Chinchilla Care
Chinchilla Food
Custom Chinchilla Cages
Chinchilla Cage Accents
Chinchilla Playtime
LY Chinchillas: About Us!
As always, don’t forget to reach out and stay in touch with LY Chinchillas on social media! We’re on YouTube, Facebook, Instagram, Vine, and Twitter!
We’ll be sure to update the Favorite Topics page as time goes on, so don’t forget to leave us some commentary and follow the blog! 🙂
These past few weeks have been busy! As we slowly emerge from a long winter, a few major changes have come to LY Chinchillas too: we switched from our custom-built digs over to Ferret Nation 182 cages! Admittedly, I went a little crazy with the purchasing process because we ended up with 3 full double units, but after much deliberation on space and convenience, I’ve decided to keep the third double unit boxed up and in storage until more space allows for it in the future.
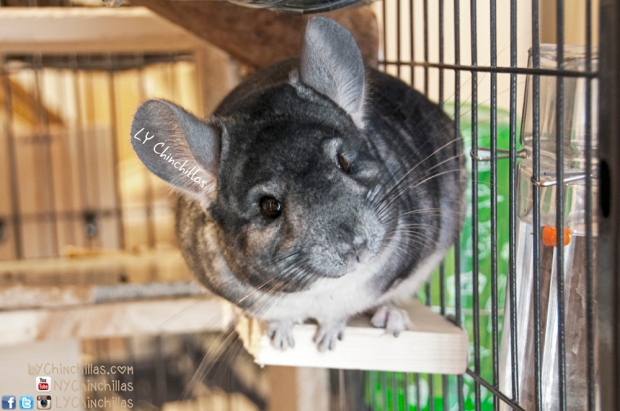
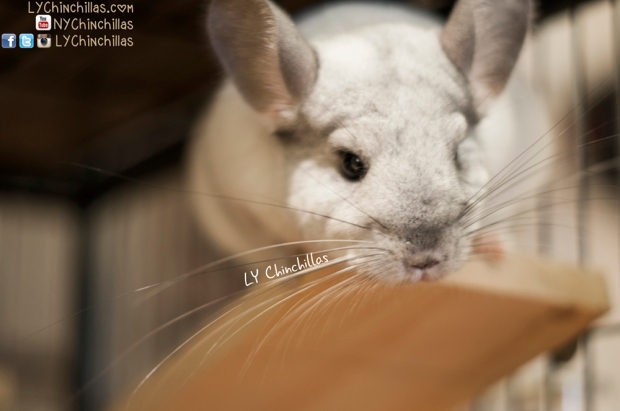
To start, I’ll speak a little about the emotional change that comes with a major cage change. We had built our custom cages with time, energy, and great care, and they turned out great. They were a little less spacious than I had hoped given the constraints of finding a convertible wardrobe unit, but the larger cages had a lot of vertical space for the two mosaic girls Lulu & Fifi, as well as my standard firstborn son Mittenmaus. Koko resided in the top cage partition, as she has never (to this day) displayed an iota of jumping capability. Separately, Muff had a custom cage built out of two smaller unit cages that he simply loved, including a climbing wall and lots of space for his jellybean self to roam and chirp. There were some downsides to the custom cages, but overall, they were built with great love and care with safety and personalities in mind.
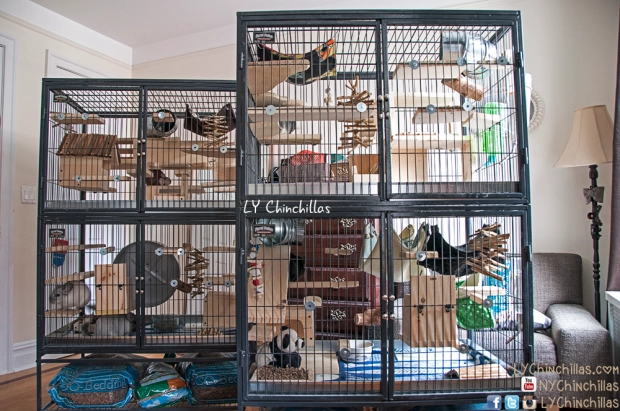
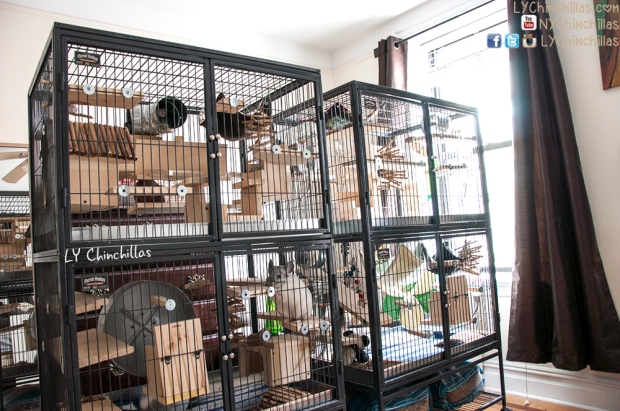
And then, before I knew it, the Ferret Nations were on their way. Honestly, it was a spur of the moment order. I had been thinking about new cages for a while, and after researching options on the market, opted for the 182 model. And then, before I knew it, the Ferret Nations had arrived. The cages have a ton of positive points, but the first few nights were actually filled with anxiety for both me and some of the chins.
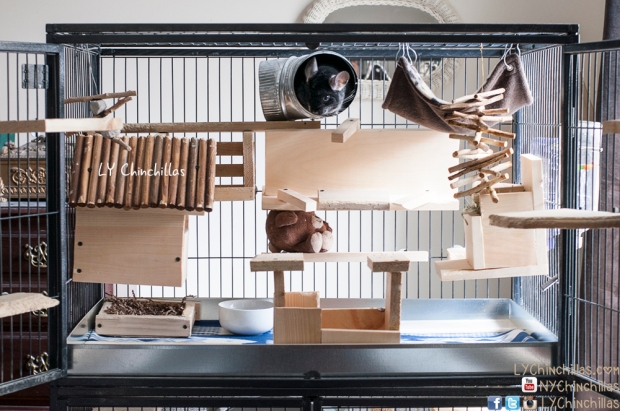
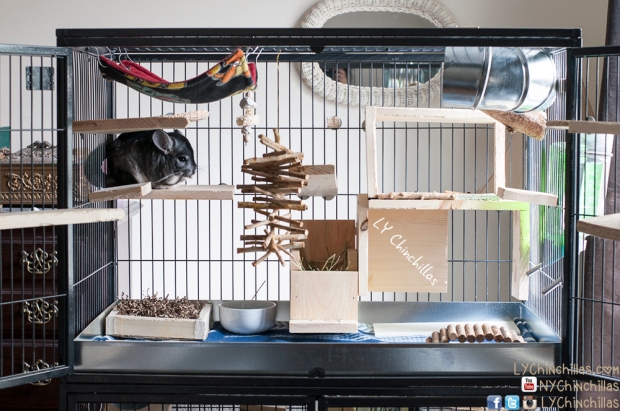
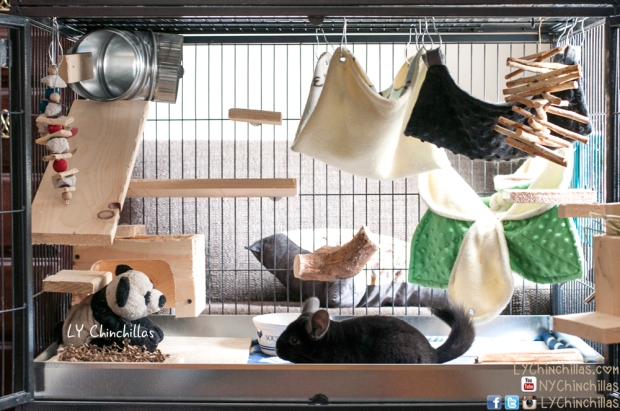
The girls didn’t mind at all. They are seemingly more independent and less attached to the comfort of any one place, as if peace of mind is something already engrained in their brains, bringing a sense of ease and calm to their transition. Mitty is an (unsuccessful) escape artist, that’s just how he rolls. He explored his cage to the fullest, memorized each jump and leap and corner, and settled in. Of course, he’s still going forward with his master plan of eventually escaping, and I do wish I could give him a full double unit to himself, but the space is adequate for him and I’m confident that he will adjust over time. Muff, on the other hand, was as nervous as I was. He missed his old cage! Truthfully, this space was a little bit of a downgrade for him, height-wise. The way Muff was acting, I was really starting to doubt my decision. There was a noticeable increase in stress: nervous squeaking, an unwillingness to talk to me or meet my hands, weight loss, and agitated jumping for several days. Part of me wanted to turn back and give him back his old everything, but I made the executive decision to wait and let the new cages settle in – for both me, and the chins.
I knew that I purchased these cages for a particular reason: in the hopes that they are the very best, safest, and cleanest option for our living situation right now. Residing in a NYC apartment is not exactly spacious, and every square foot counts. The same day the cages were set up and before I had the chance to reconsider turning back, I had already dismantled the old cages and re-purposed any salvageable kiln-dried pine for ledges and platforms in the new cages. This made it tough, because the moment I started taking parts down, I knew that I wasn’t going to reconstruct the old cages. I had some restless sleep (yes, I’m seriously in tune with my kids) but I lived with it. It was time to move forward. In the following week, all of Muff’s weight loss had been regained, and attitudes from all parties were perking up.
So, that brings me to this very lengthy post – a post which, in many ways, is a formulation of my opinions that are still in infancy. I’ve had the new cages for under a month, and have had some time to modify their interiors to my liking. While I have yet to make any definitive emotional connection with Ferret Nation, I’ve also been forced to put my custom cages in my past. I figured that places me in a unique position to evenly critique the pros and cons of Ferret Nation.
PROS
CONS
The takeaway? These cages are great for our status quo. Make no mistake about it: when the time comes to buy a house in the country, I have grand plans to painstakingly build fully customized cage mansions for each of the chins (blueprints are already on hand). For now, Ferret Nations will do the job, and do the job relatively well. Stay tuned for future posts about FN cage customization! 🙂
LY Chinchillas Treat Donation
Donate healthy, delicious treats to LY Chinchillas to help keep our content going!
$5.00